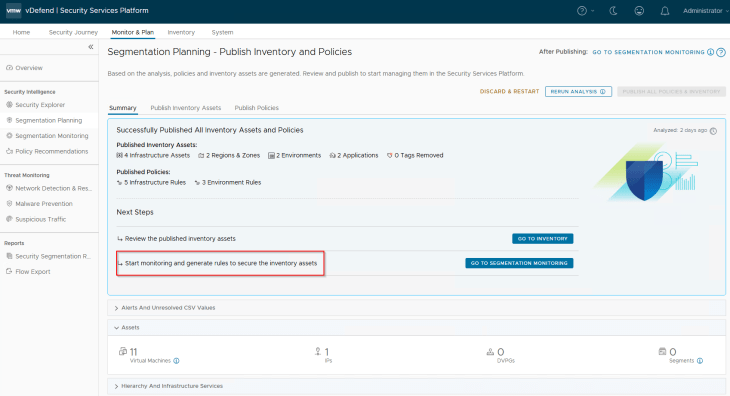
Welcome back!!! We are at Part 5 of the blog series on vDefend Security Services Platform and Security Segmentation. In the previous chapter, we performed an application hierarchy ingestion and generated the recommendations for assets and policies. Now let’s start publishing the assets and policies and review the NSX objects that are created by the workflow.
If you were not following along, please check out the previous chapters of this blog series below:
Part 1: Introduction
https://vxplanet.com/2025/12/18/vdefend-security-services-platform-and-security-segmentation-part-1-introduction/
Part 2: Platform Deployment
https://vxplanet.com/2025/12/19/vdefend-security-services-platform-and-security-segmentation-part-2-platform-deployment/
Part 3: NSX Onboarding and Feature Activation
https://vxplanet.com/2025/12/19/vdefend-security-services-platform-and-security-segmentation-part-3-nsx-onboarding-and-feature-activation/
Part 4: Application Hierarchy Import
https://vxplanet.com/2025/12/22/vdefend-security-services-platform-and-security-segmentation-part-4-application-hierarchy-import/
Let’s get started.
Publishing Infrastructure Assets
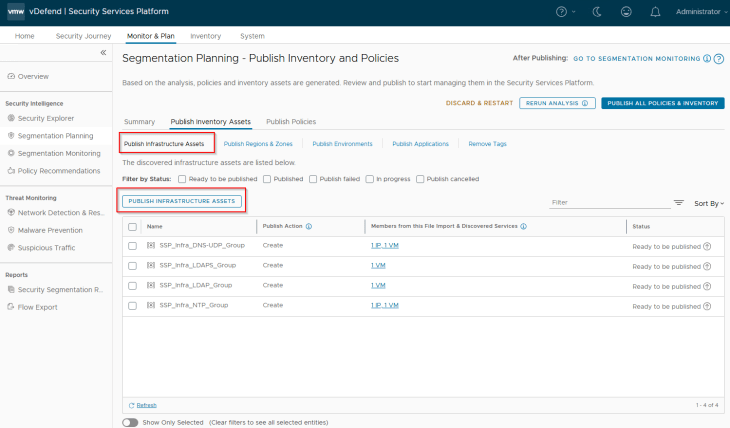
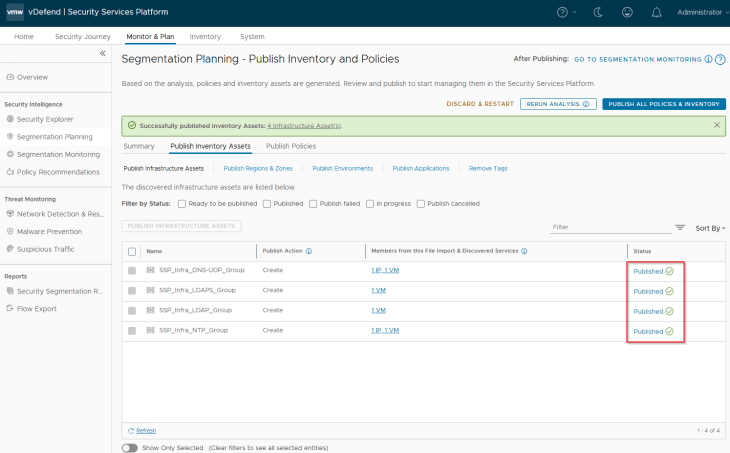
Navigate to Segmentation Planning -> Publish Inventory Assets -> Publish Infrastructure Assets, select all the Infrastructure assets that are recommended and click on Publish. During the initial publish, we see the publish action as ‘Create’, however it’s also possible that some infrastructure assets may already exist as part of a previous import. In this case, we see the action against those assets as ‘Refresh’ as this process updates the existing asset’s membership with additional members.
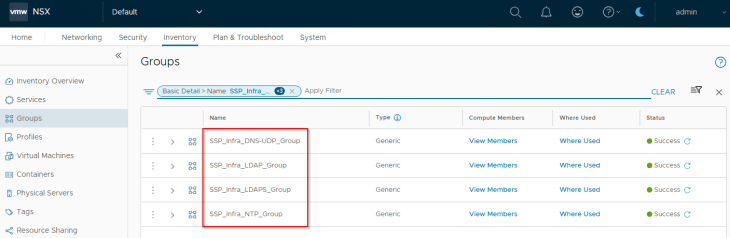
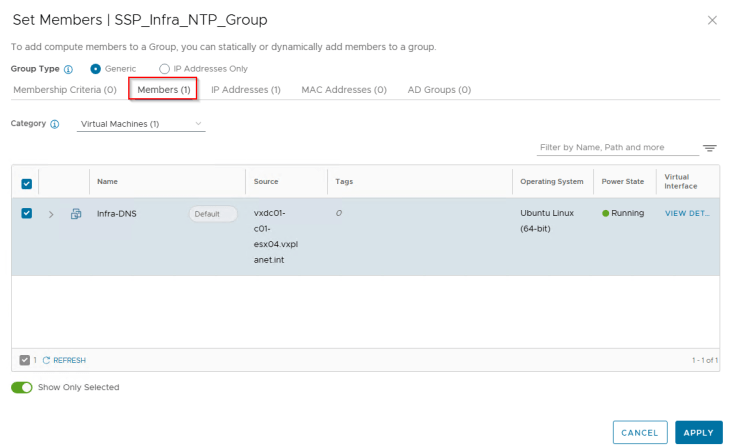
We should see the published assets under Inventory -> Infrastructure Assets
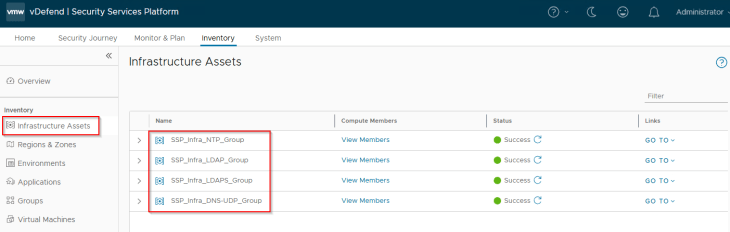
Infrastructure Assets in SSP are realized as security groups in NSX with a static membership.
Publishing Regions and Zones
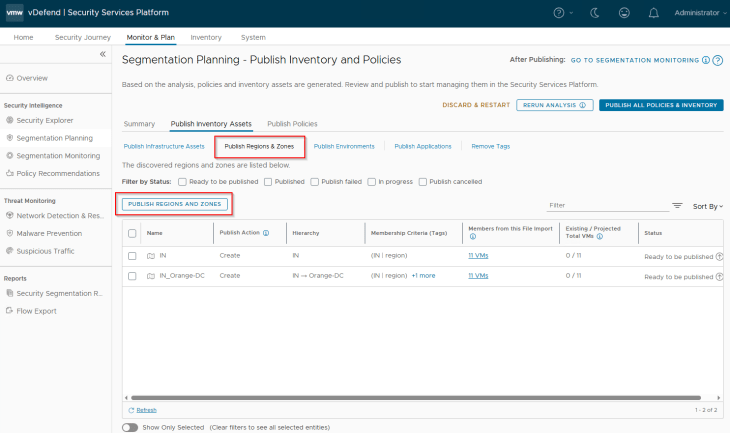
Navigate to Segmentation Planning -> Publish Inventory Assets -> Publish Regions and Zones, select the regions and zones that are recommended and click on Publish. During the initial publish we see the publish action as ‘Create’, however it’s also possible that the regions or zones may already exist as part of a previous import. In this case, we see the action against those assets as ‘Refresh’ as this process updates the existing asset’s membership with additional members or make changes in the assigned tags. We also have another publish action called ‘Promote’ in scenarios where we promote an existing NSX Group as Region or Zone in SSP.
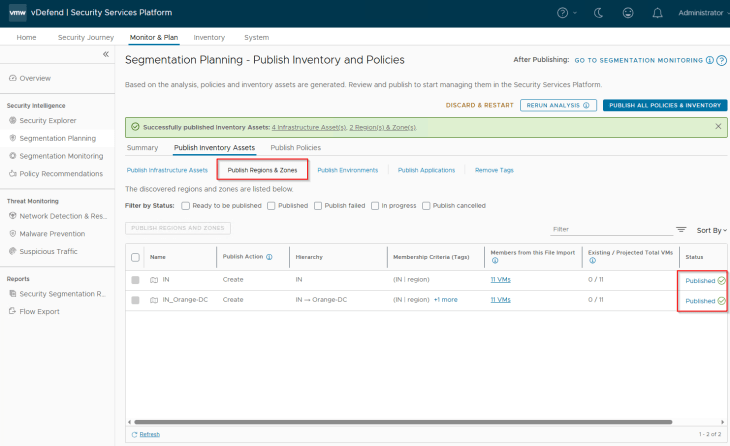
We should see the published assets under Inventory -> Regions & Zones
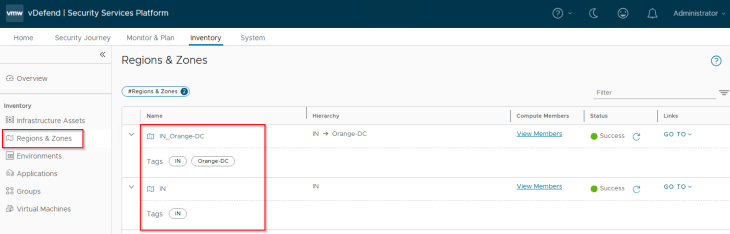
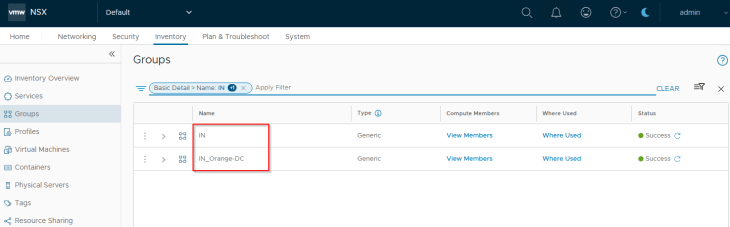
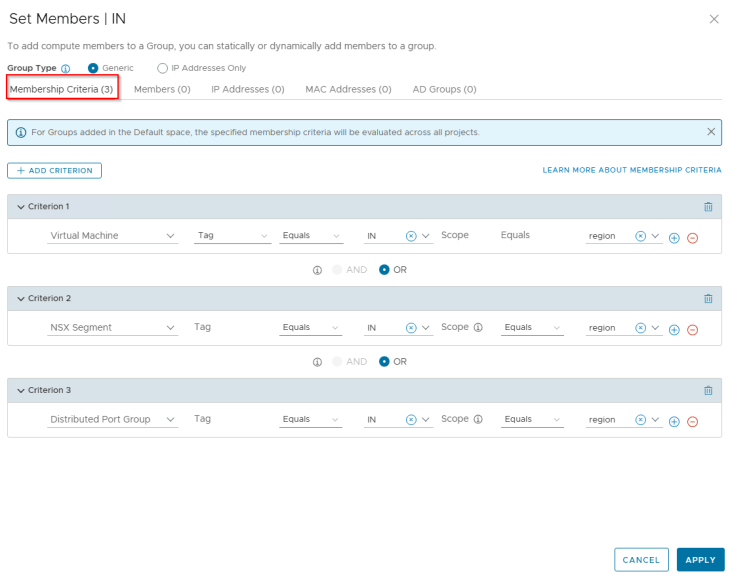
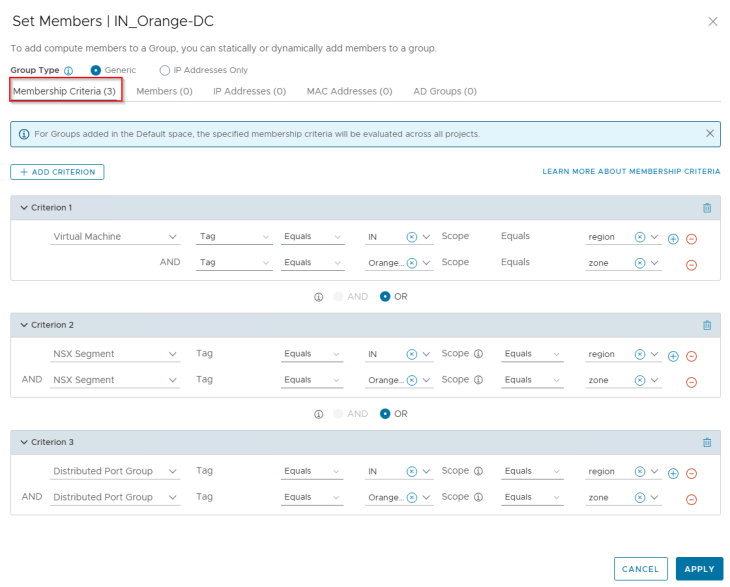
Regions and Zones in SSP are realized as security groups in NSX with a dynamic membership criteria. At this stage, the Region and Zone scope information included in the CSV has been used to tag the VMs for this hierarchy level, and the VMs will become part of the respective security groups in NSX.
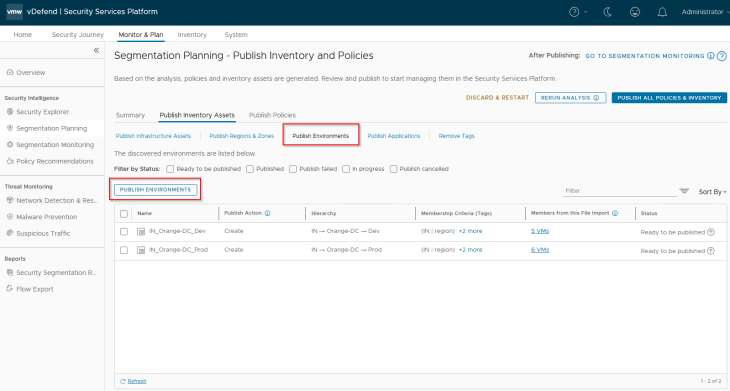
Publishing Environments
Navigate to Segmentation Planning -> Publish Inventory Assets -> Publish Environments, select the two environments (Prod and Dev) that are recommended and click on Publish. Note that environments are named based on the hierarchy.
During the initial publish we see the publish action as ‘Create’, however it’s also possible that the environments may already exist as part of a previous import. In this case, we see the action against those assets as ‘Refresh’ as this process updates the existing environment asset’s membership with additional members or make changes in the assigned tags. We also have another publish action called ‘Promote’ in scenarios where we are promoting an existing NSX Group as Environment in SSP.
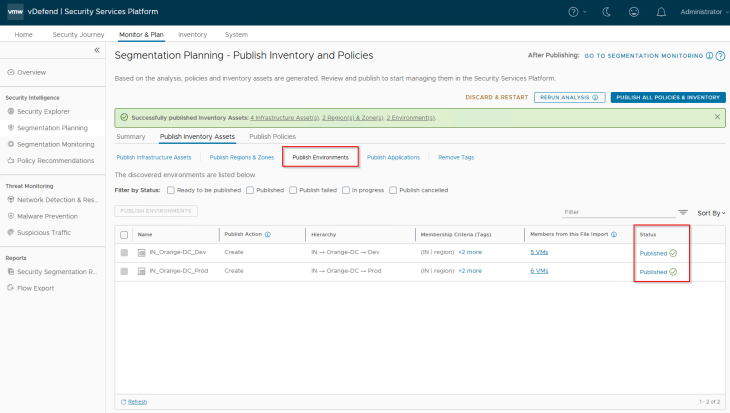
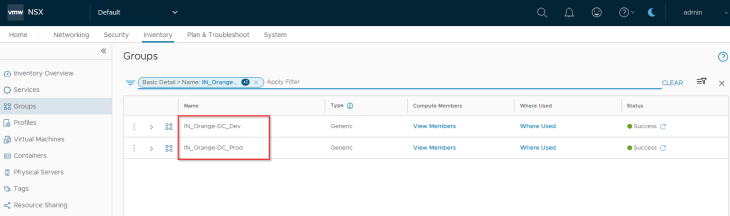
We should see the published assets under Inventory -> Environments

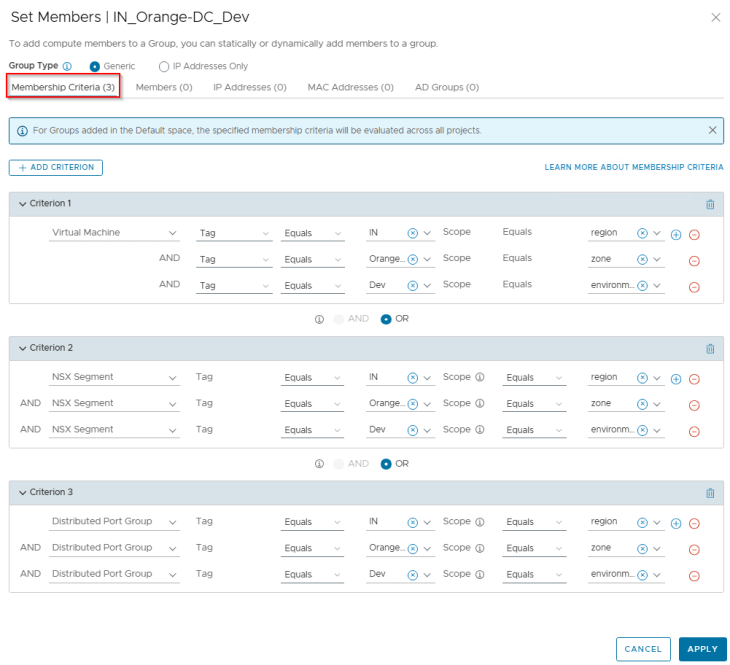
Environments in SSP are realized as security groups in NSX with a dynamic membership criteria. At this stage, the Environment scope information included in the CSV has been used to tag the VMs for this hierarchy level, and will become part of the respective security groups in NSX. The respective Environment tags are applied on top of the existing Region and Zone tags.
Publishing Applications
Navigate to Segmentation Planning -> Publish Inventory Assets -> Publish Applications.
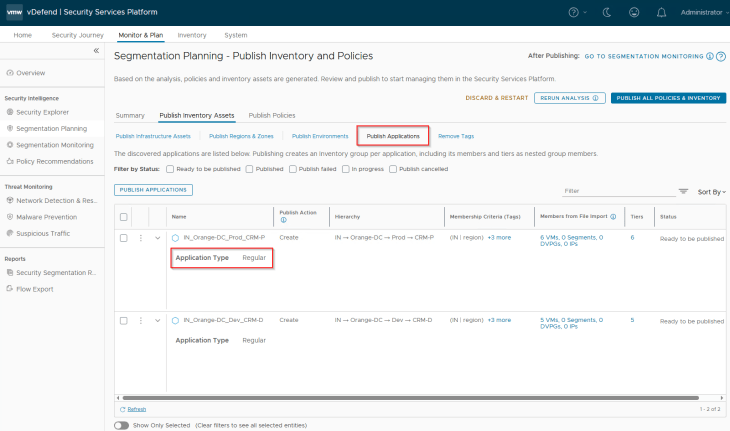
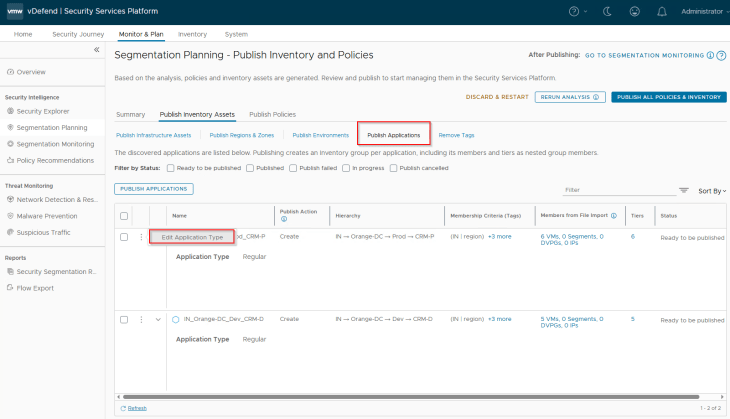
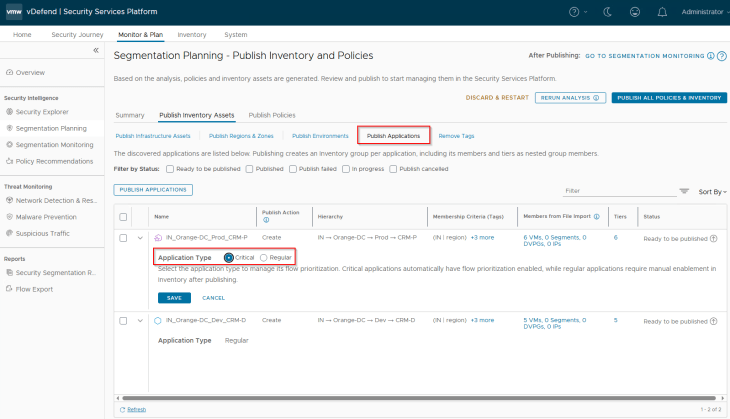
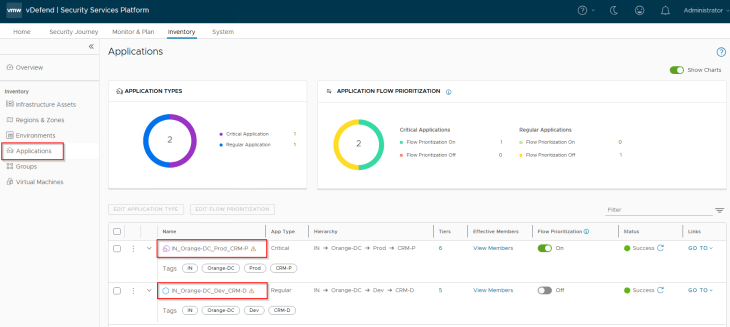
We do have an option to do flow prioritization for applications, that means flows from the selected applications will be prioritized and included in data collection in scenarios where the platform is operating near at maximum flow ingestion capacity. Flows from non-prioritized applications will be excluded from data collection. Flow prioritization can be enabled by changing the application type to Critical. Let’s do this for the CRM-Prod application.
Now let’s select the two applications (CRM-P and CRM-D) and click on Publish. Note that applications are named based on the hierarchy unless we are promoting existing groups from NSX.
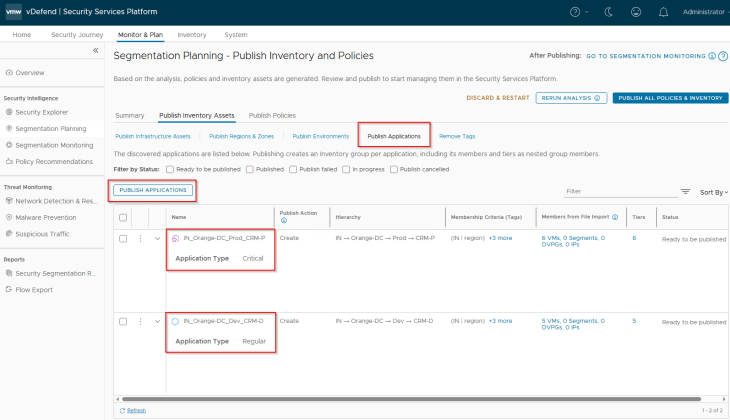
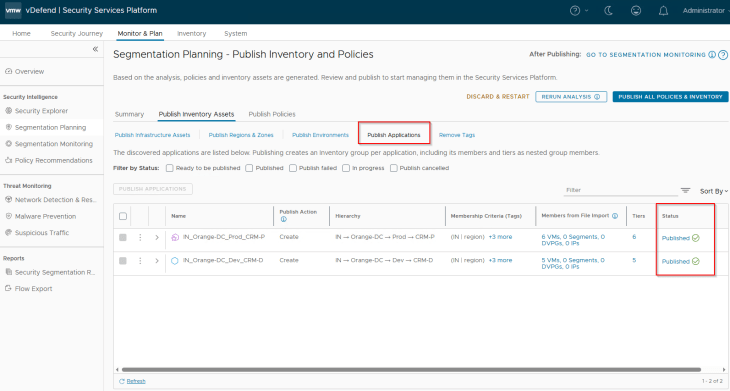
During the initial publish we see the publish action as ‘Create’, however it’s also possible that the applications may already exist as part of a previous import. In this case, we see the action against those assets as ‘Refresh’ as this process updates the existing application’s membership with additional members or make changes in the assigned tags, one scenario will be application scale-out (We will discuss more on this in Part 9). We also have another publish action called ‘Promote’ in scenarios where we are promoting an existing NSX Group as Application in SSP.
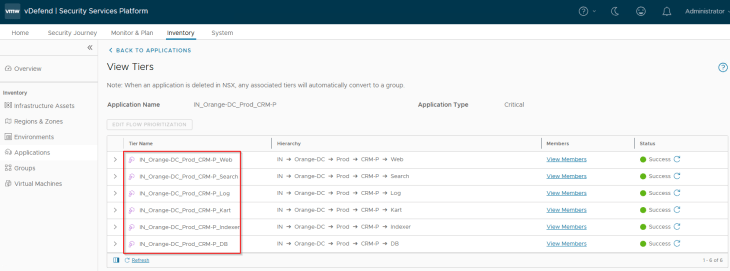
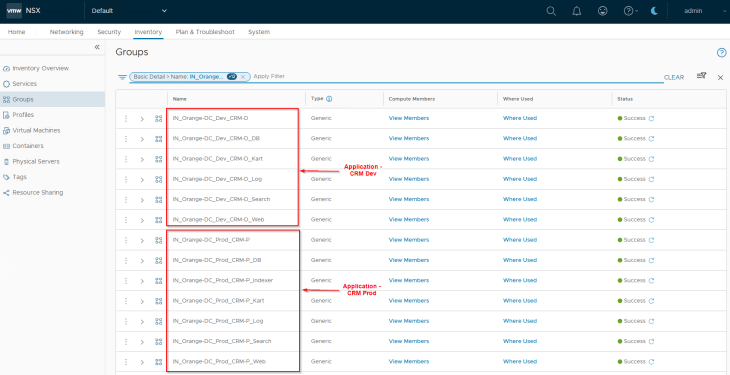
We should see the published assets under Inventory -> Applications. Next to Application, we also see the associated Application Tiers as Inventory assets.
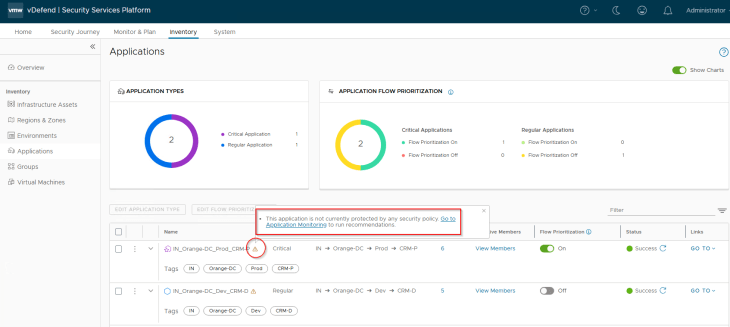
A warning sign next to the Application assets means that there are no DFW policies associated with the application. This is expected, as we haven’t reached that stage yet.
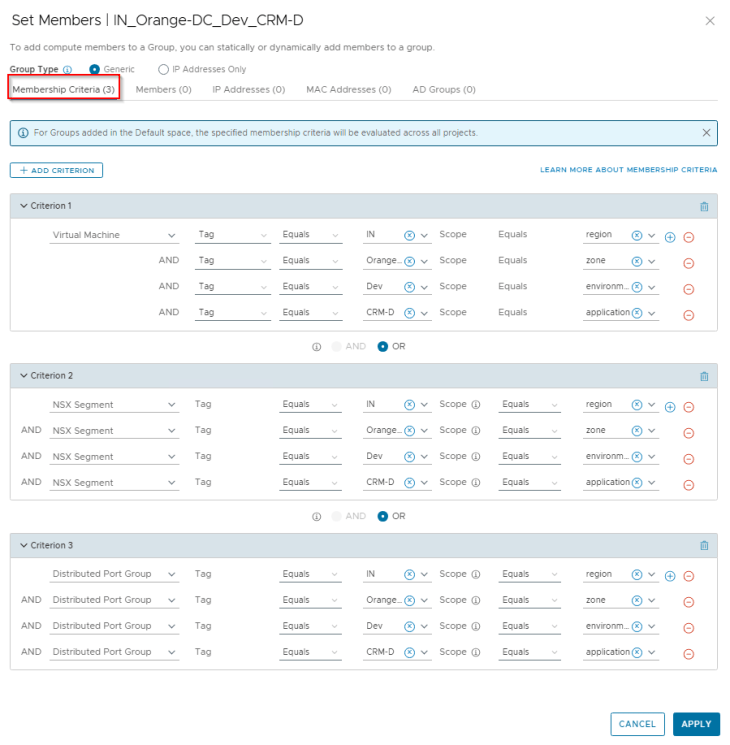
Applications in SSP are realized as security groups in NSX with a dynamic membership criteria. At this stage, the Application and Application Tier scope information included in the CSV has been used to tag the VMs for this hierarchy level, and will become part of the respective security groups in NSX. The respective Application and Application Tier tags are applied on top of the existing Region, Zone and Environment tags.
Publishing Standard Infrastructure Policies
Navigate to Segmentation Planning -> Publish Policies -> Publish Infrastructure Rules, and hit on Publish.
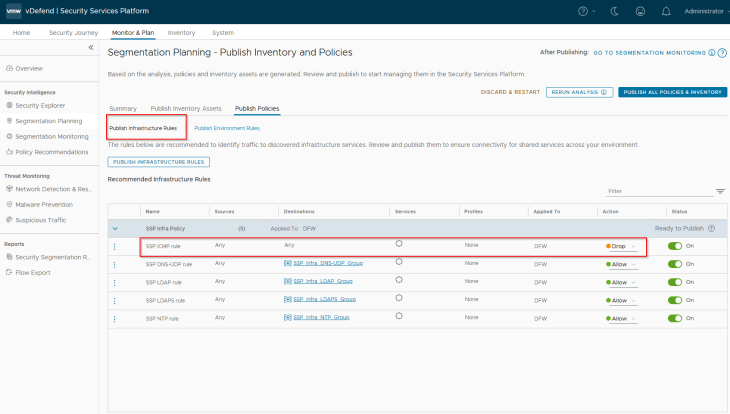
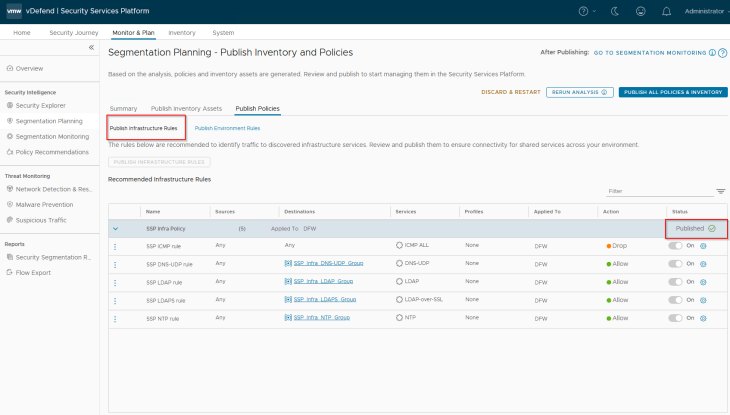
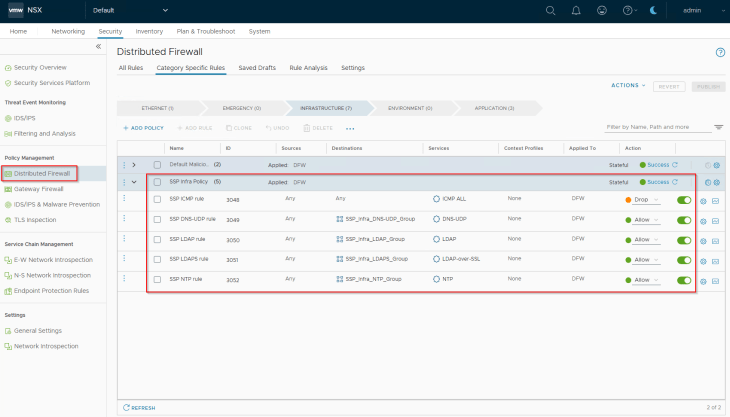
We should see the standard infrastructure rules created under the Infrastructure category in DFW.
As the traffic start matching the published infrastructure rules, we should see Protected flows in the Security Explorer dashboard.
Publishing Default Environment Policies
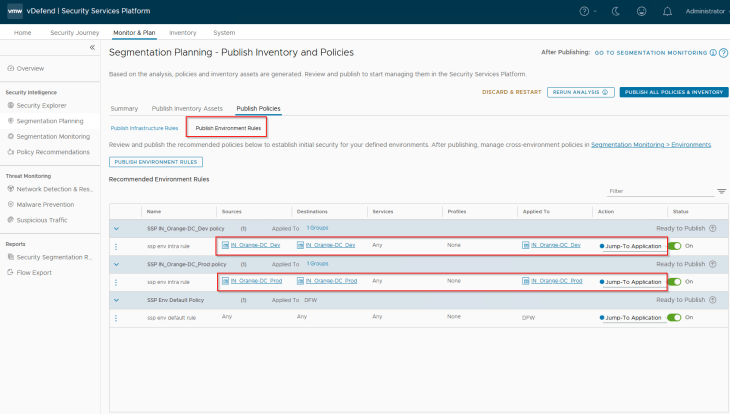
Navigate to Segmentation Planning -> Publish Policies -> Publish Environment Rules, and hit on Publish. The default environment rules are only intra-environmental with an action of ‘Jump to Application’ that allows the traffic to be further analysed against Application category microsegmentation rules. Changing the action to ‘Allow’ simply means Environment / zone segmentation use case, where the traffic is allowed and is not analysed against Application category rules.
There is also an environment specific default rule at the bottom with a ‘Jump to Application’ action. This is meant for monitoring purposes to recommend granular inter-environmental rules.
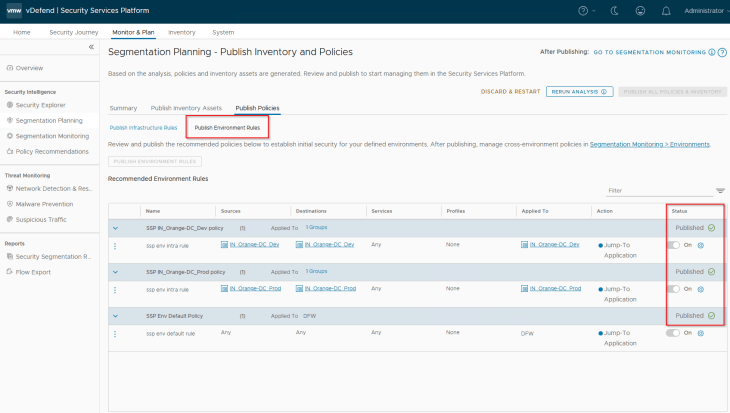
We should see the default environment rules created under the Environment category in DFW.

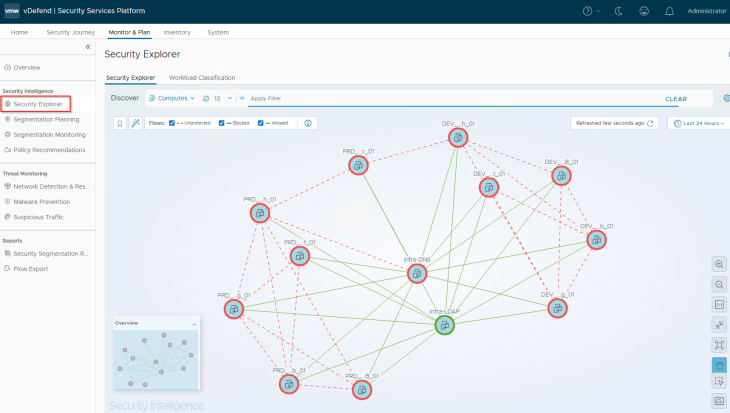
Alright, at this stage we should see Protected flows in the Security Explorer dashboard, and they are mostly related to flows hitting the Allow rules for Infrastructure services, which means we made some progress.
So, what’s next? We haven’t created any lockdown rules for infrastructure policies yet, we don’t have inter-environmental rules and exceptions, we haven’t created microsegmentation rules for the applications, let’s take a pause here and will cover these topics in the next chapter. Stay tuned!!!
I hope the article was informative. Thanks for reading.

Continue Reading? Here are the other parts of this series:
Part 1: Introduction
https://vxplanet.com/2025/12/18/vdefend-security-services-platform-and-security-segmentation-part-1-introduction/
Part 2: Platform Deployment
https://vxplanet.com/2025/12/19/vdefend-security-services-platform-and-security-segmentation-part-2-platform-deployment/
Part 3: NSX Onboarding and Feature Activation
https://vxplanet.com/2025/12/19/vdefend-security-services-platform-and-security-segmentation-part-3-nsx-onboarding-and-feature-activation/
Part 4: Application Hierarchy Import
https://vxplanet.com/2025/12/22/vdefend-security-services-platform-and-security-segmentation-part-4-application-hierarchy-import/


