
Welcome to Part 2 of the blog series on vDefend Security Services Platform and Security Segmentation. Part 1 provided an overview of SSP and security segmentation journey covering the requirements, platform components, deployment topologies, segmentation planning and a short comparison between SSP and its predecessor NAPP. Here is the link to Part 1, in case you missed it.
Part 1: Introduction
https://vxplanet.com/2025/12/18/vdefend-security-services-platform-and-security-segmentation-part-1-introduction/
In this chapter, we will do a walkthrough of the deployment process of SSP followed by validation checks using the diagnostics utility available within the platform.
Let’s get started:
Current Lab Environment
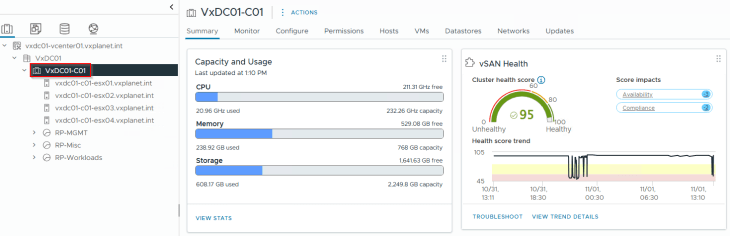
The current lab environment is a consolidated 4-node vSphere cluster that hosts both the management components and compute workloads. Both SSP Installer and SSP Instance will be deployed on to the same management vSphere cluster, using routed network topology (which we discussed in Part 1).
All the pre-requisites for SSP deployment (discussed in Part 1) have been reviewed and are confirmed to be in place.
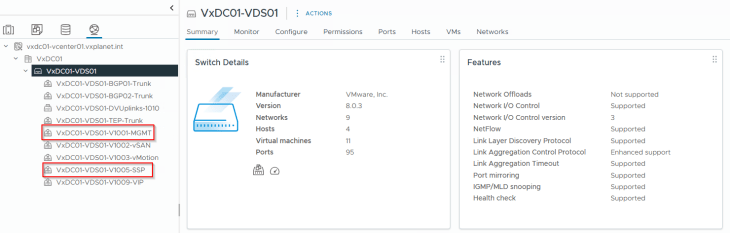
The below networks will be used for the deployment:
- VxDC01-VDS01-V1001-MGMT: For the SSP Installer VM
- VxDC01-VDS01-V1005-SSP: For the SSP Instance VMs
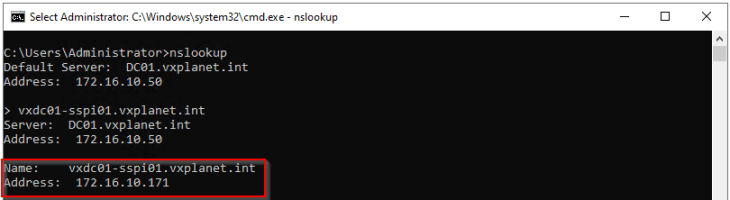
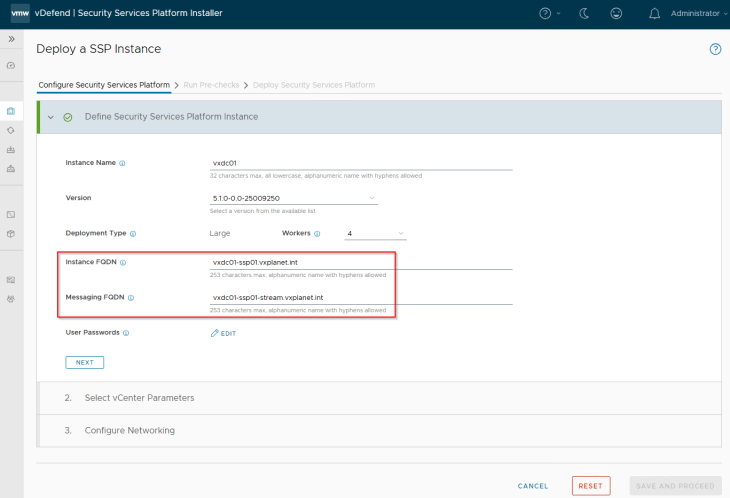
DNS host records for the SSP Installer, SSP Instance and SSP Messaging has been pre-created using IP addresses from the respective networks above.
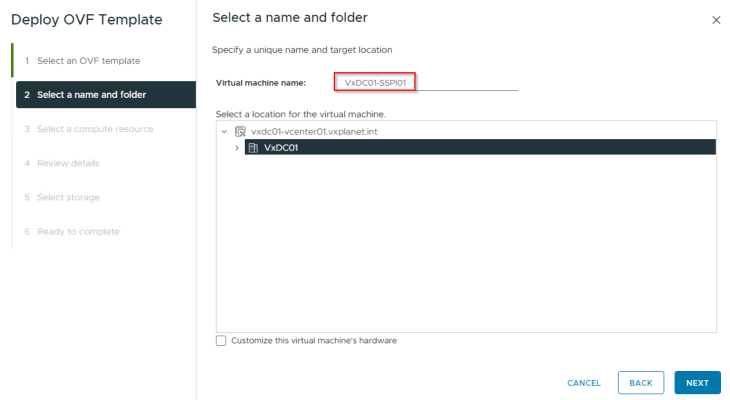
SSP Installer FQDN: vxdc01-sspi01.vxplanet.int
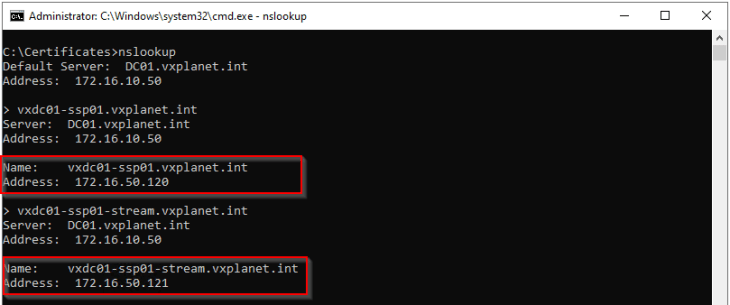
SSP Instance FQDN: vxdc01-ssp01.vxplanet.int
SSP Messaging FQDN: vxdc01-ssp01-stream.vxplanet.int
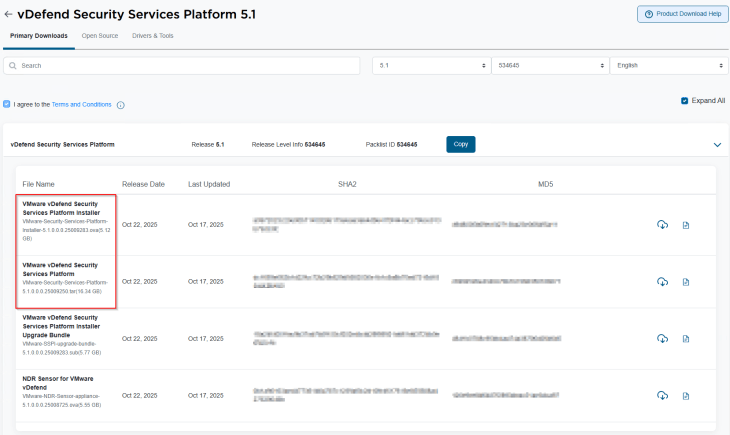
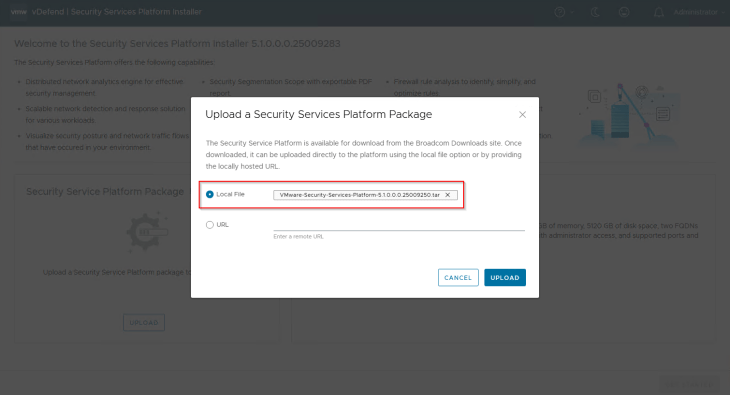
The necessary binaries for SSP Installer and SSP Instance are downloaded from the Broadcom Support portal. SSP Installer is available as an ova bundle, and SSP Instance package is available as a tar file having the node VM templates and container images.
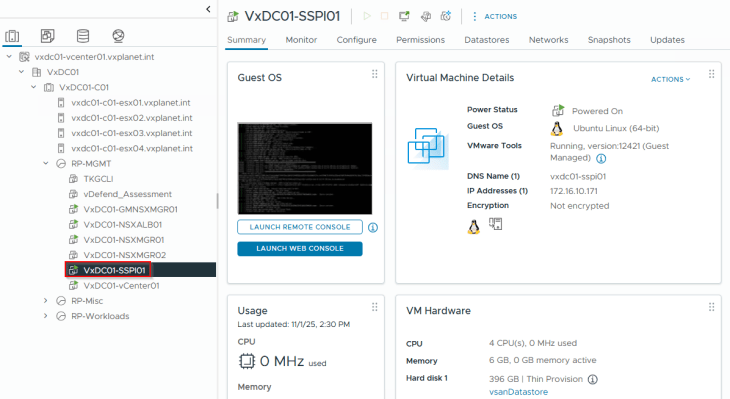
Deploying the SSP Installer
We will deploy the SSP Installer to the management vSphere cluster VxDC01-C01 under the resource pool RP-MGMT via ova import, like other ova-based appliance deployments.
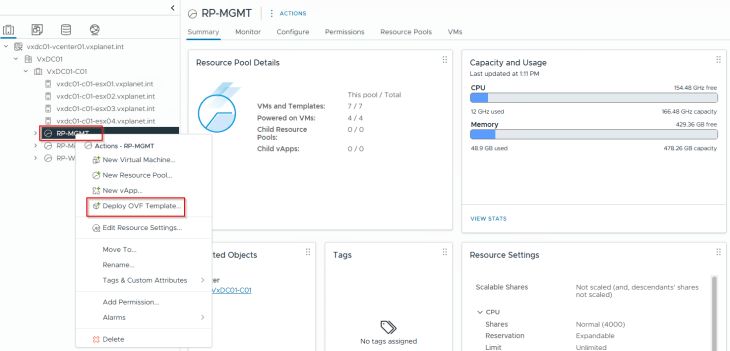

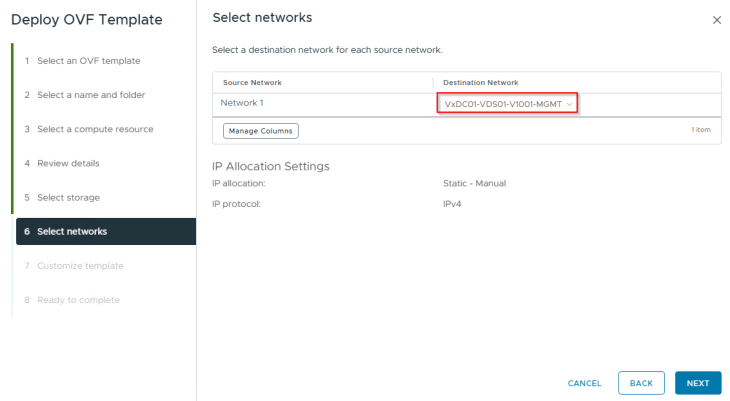
The network for the SSP Installer will be VxDC01-VDS01-V1001-MGMT
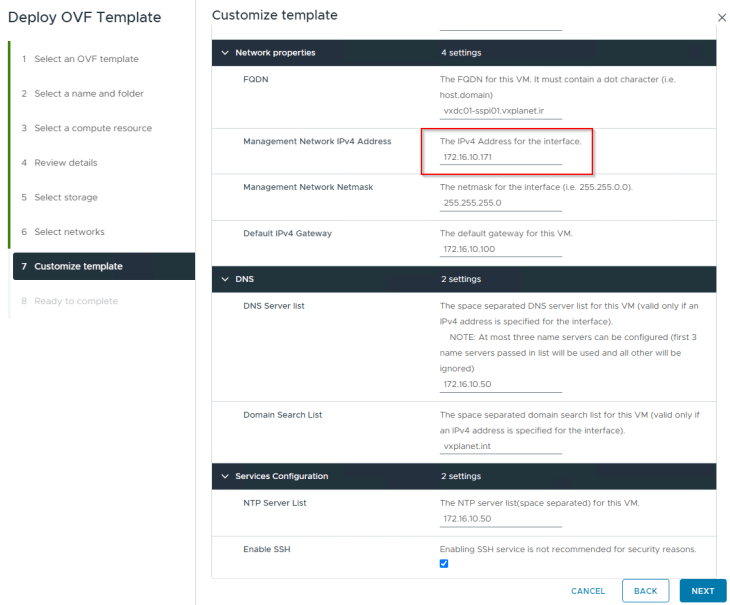
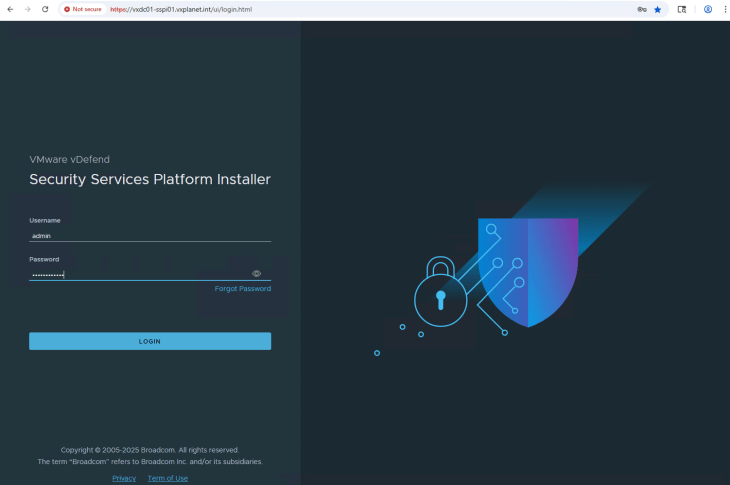
Once the appliance is deployed, let’s power on the appliance and wait for the SSP Installer UI to initialize, usually this takes around 2 mins. UI is accessed using the SSP Installer FQDN.
Deploying the SSP Instance
SSP Instance is deployed and lifecycle managed by the SSP Installer. Let’s login to the SSP Installer appliance and import the SSP bundle that we downloaded earlier.
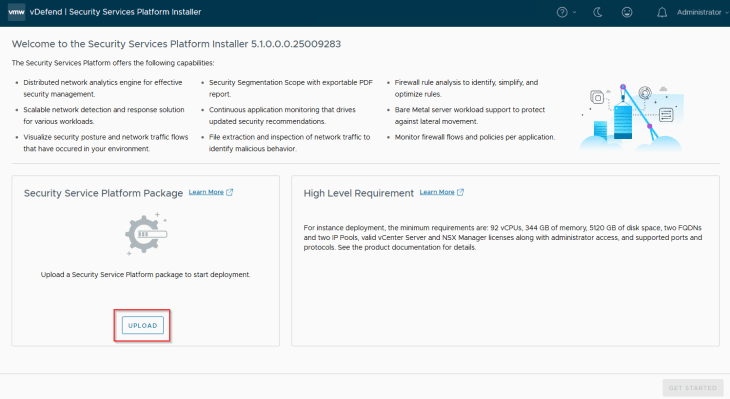
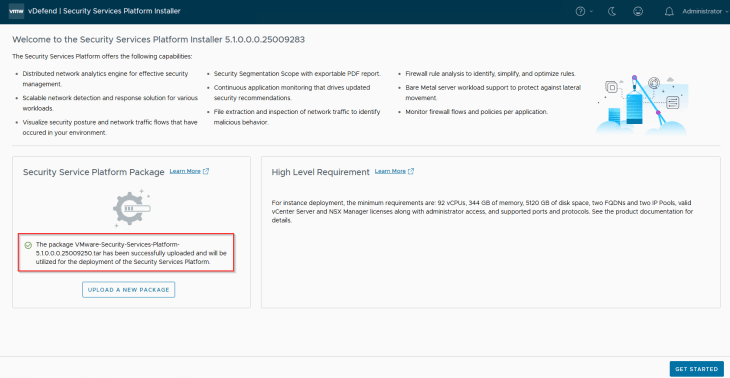
We will now start the SSP Instance deployment workflow.
SSP Instance name must be unique and will be used as a prefix for the Instance VMs and other inventory objects that the workflow will create. We should not deploy multiple SSP Instances with the same instance name under the same vCenter. The fields for Instance and messaging FQDNs come from the DNS record that we created earlier.
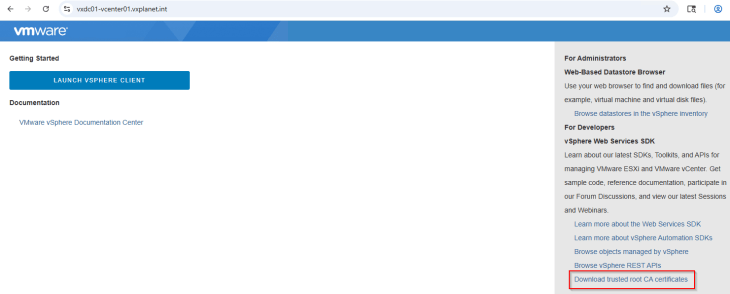
We will now provide the configuration parameters for the management vCenter server where the SSP Instance will be deployed. The workflow requires vCenter root certificate to be presented in order to establish trust with the vCenter server.

vCenter trusted root certificates can be downloaded directly using the vSphere client and need to be converted to a base64 encoded format (like pem).
We will choose a storage policy that has a valid datastore associated. SSP currently does not support datastore clusters. In my lab, due to space constraints, I created a custom vSAN storage policy with FTT value of zero , which means no storage redundancy for the vSAN objects. Please note that storage policy once set, cannot be changed after SSP Instance is deployed.
Resource reservation is strictly recommended for production deployments.
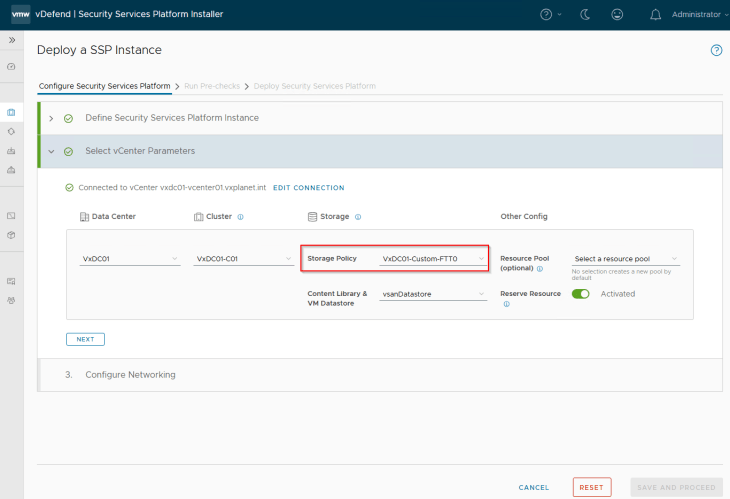
As discussed earlier, we are using a routed network topology for the SSP deployment, hence we will choose the network ‘VxDC01-VDS01-V1005-SSP’. We will provide a range of IP addresses from this subnet for the Instance VMs (called Node IP Pool) and Platform / Kubernetes services (called Service IP Pool). To support full scale SSP deployment, 16 IP addresses for Node IP Pool and 12 IP addresses for Service IP Pool are required.

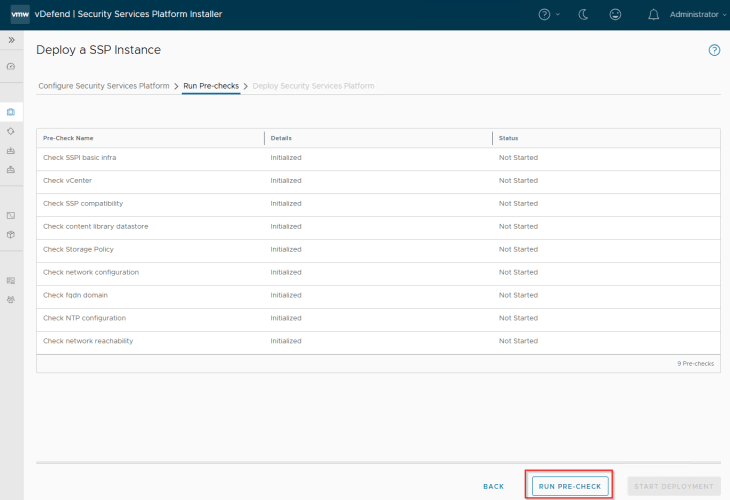
Configuration inputs are now done, we will run pre-checks to confirm deployment readiness. The pre-check process will also deploy a temporary pre-check VM with the sizing of a worker node to validate network configurations. Any errors or warnings in the pre-checks result need to be remediated before proceeding with deployment.
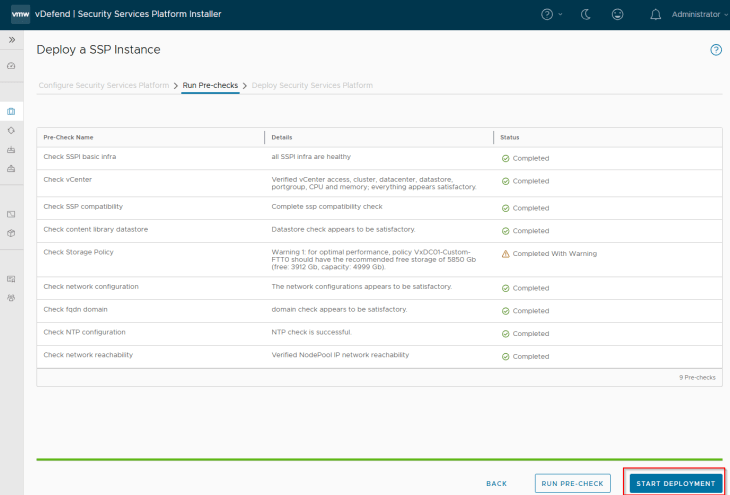
We see a warning related to storage requirements, but that is fine, we will skip this as this is a lab environment and we don’t plan to ingest much volume of data to SSP. Let’s click on ‘Start Deployment’ and wait for the deployment to complete.
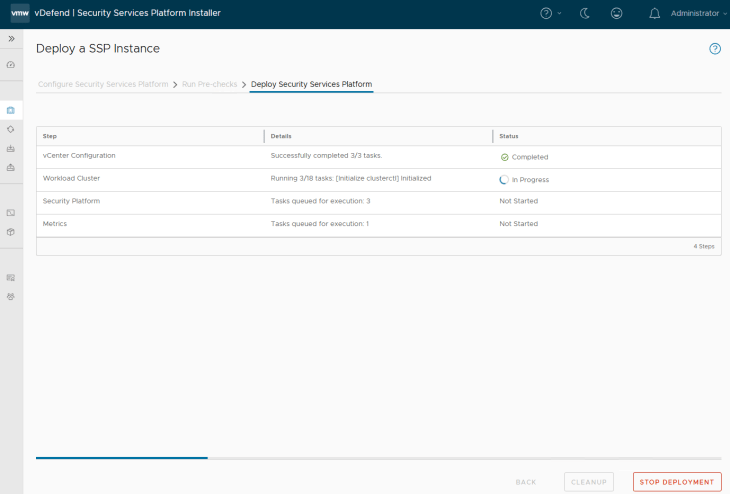
This process might take some time to complete, probably it’s a good time to take a small coffee break and once we are back the deployment should be completed.
Below is a quick summary of tasks that will be executed in the background:
- Configures a single node management Kubernetes cluster in the SSP Installer VM
- Configures a Harbor registry in the SSP Installer VM to host the SSP platform container images
- Configures a vCenter content library and uploads a K8S node VM template
- Deploys a Kubernetes workload cluster (called SSP Instance) in the management vCenter under a new resource pool
- Deploys SSP platform core components in the workload cluster
- Configures vSphere CSI to provision persistent volumes (PVs) on the selected datastore
- Exposes the SSP Instance FQDN and messaging FQDN as Kubernetes Ingress services
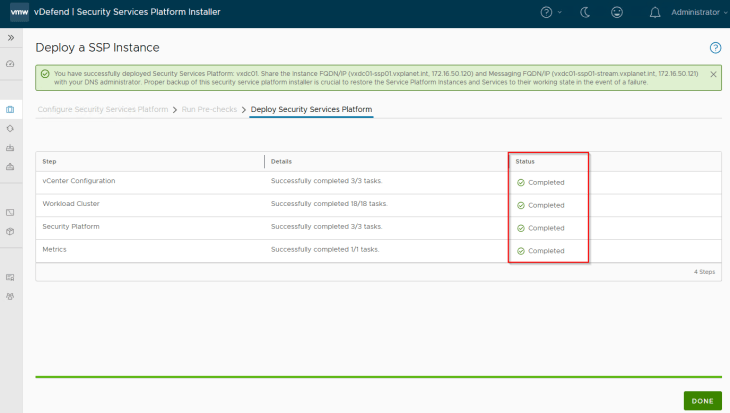
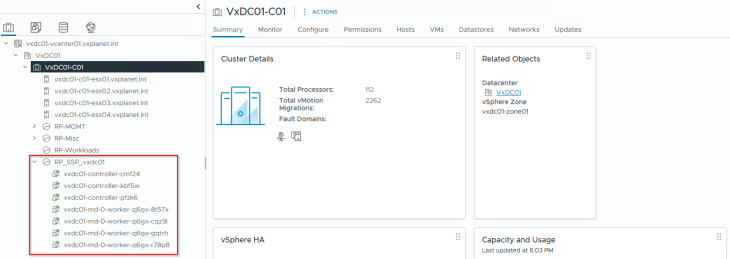
Success!!! SSP Instance deployment has succeeded. We should see the SSP Instance VMs deployed under the ‘RP_SSP_<InstanceName>’ resource pool in the management vCenter.
Deployment Diagnostics
SSP Installer has an inbuild diagnostics section that shows a map / grid view of the overall component health status of the SSP Instance.
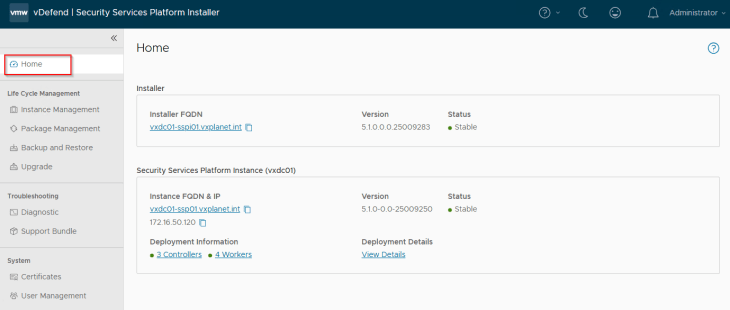
Let’s login to the SSP Installer UI and navigate to the Home section. This section shows basic information about the deployment including the FQDNs, version and summary status.
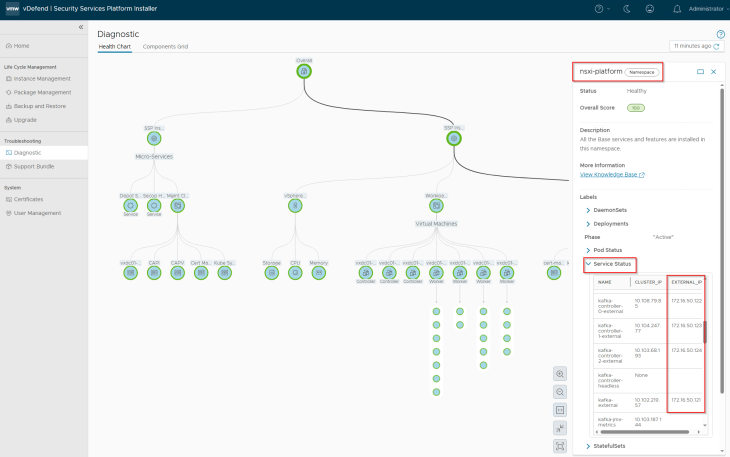
Let’s navigate to Troubleshooting -> Diagnostics section. We should see a hierarchical view of the health status of
- Management K8S cluster in SSPI
- SSP Instance (Workload K8S cluster)
- vSphere resources
- SSP Platform components (microservices)
- Persistent volumes provisioned in vCenter
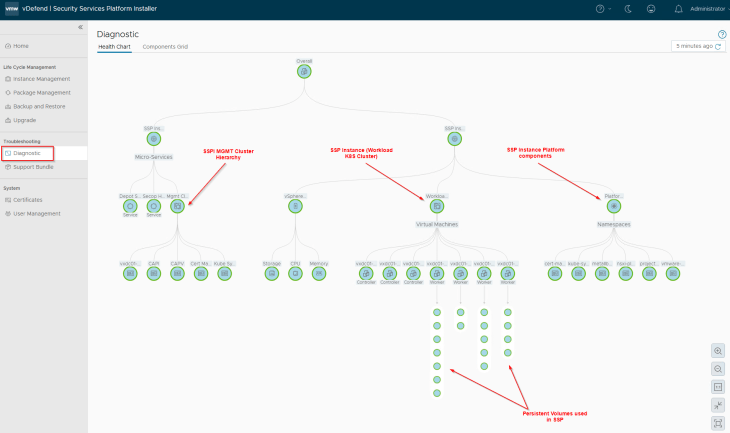
Clicking on any component gives detailed information about the component like the service status and health score
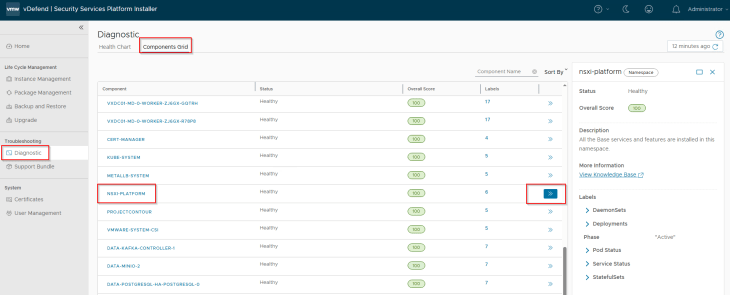
We can also switch the view to components grid.
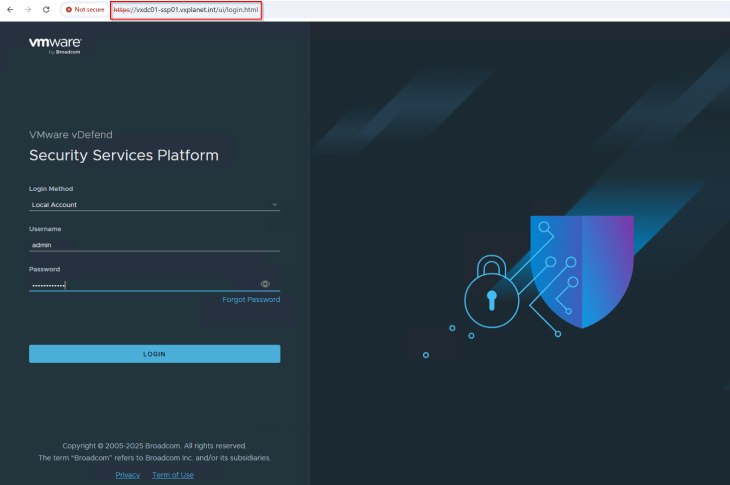
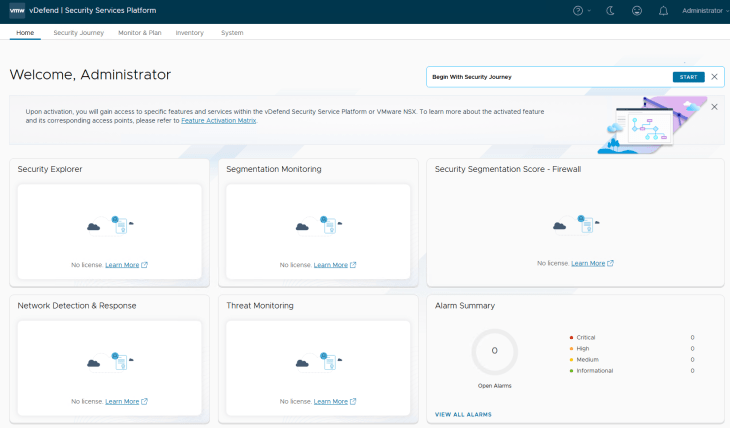
Now let’s try to login to the SSP UI using the Instance FQDN
SSP Instance VM has the necessary cli utilities (including kubectl) needed to access and manage the SSP platform. Let’s ssh to the SSP Installer VM and run A few kubectl commands against the management K8S cluster.

The above commands are related to fetching the information about the deployed workload cluster, cluster machines etc from the management K8S cluster.
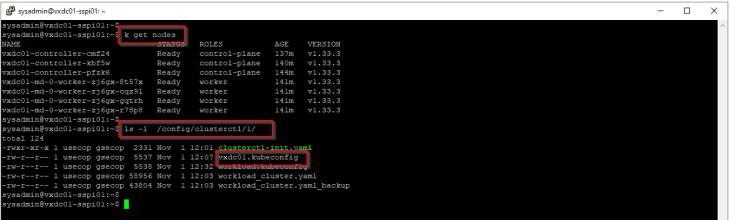
If you want to run kubectl commands against the deployed workload cluster (SSP Instance), there are two options:
Export kubeconfig of the workload cluster using clusterctl utility and specify it with the kubectl command:
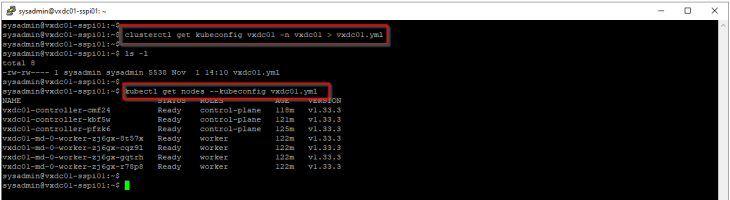

Use the kubectl alias called ‘k’:
The alias is automatically created as part of SSP Instance deployment, pointing to the workload cluster kubeconfig file at /config/clusterctl/1
Let’s also review the load balancer services created in the SSP instance

Now It’s now time to move on to the next chapter where we will onboard NSX manager cluster and activate the necessary vDefend features – Security Intelligence and Rule Analysis. See you soon!!!
I hope the article was informative. Thanks for reading

Continue Reading? Here are the other parts of this series:
Part 1: Introduction
https://vxplanet.com/2025/12/18/vdefend-security-services-platform-and-security-segmentation-part-1-introduction/


