
Welcome to the final and Part 6 of the blog series on NSX Application Platform Automation Appliance where we cover NAPP deployment in an air-gapped (internet-restricted) environment. One of the main requirements for NAPP deployment is to have direct internet access for the NSX manager cluster and the TKGS guest cluster of the NAPP instance. NAPP deployment currently doesn’t support proxy, and hence if a direct internet access is not possible, the only way for NAPP deployment is to set up a local container registry (eg: harbor) and pull the NAPP images locally from the repository. However, this comes with additional configuration and considerations, which we will cover in this blog post.
Let’s get started:
Generating the SAN certificates for Harbor deployment
We currently have four different ways to generate a certificate for the Harbor registry:
- Harbor certificate signed from a trusted public CA
- Harbor certificate signed from an internal CA
- Harbor using a self-signed SAN certificate using FQDN
- Harbor using a self-signed SAN certificate using IP address
In all the above methods, if a certificate is generated for the Harbor FQDN, make sure that the FQDN uses a public TLD (like .com, .net etc) and not a private TLD (like .lab, .int etc).
For this blog post, we will choose the second option – “Harbor certificate signed from an internal CA” as this is more common, and I don’t want to generate a public CA cert for this blog article.
Let’s pre-create a DNS host entry for the Harbor registry:
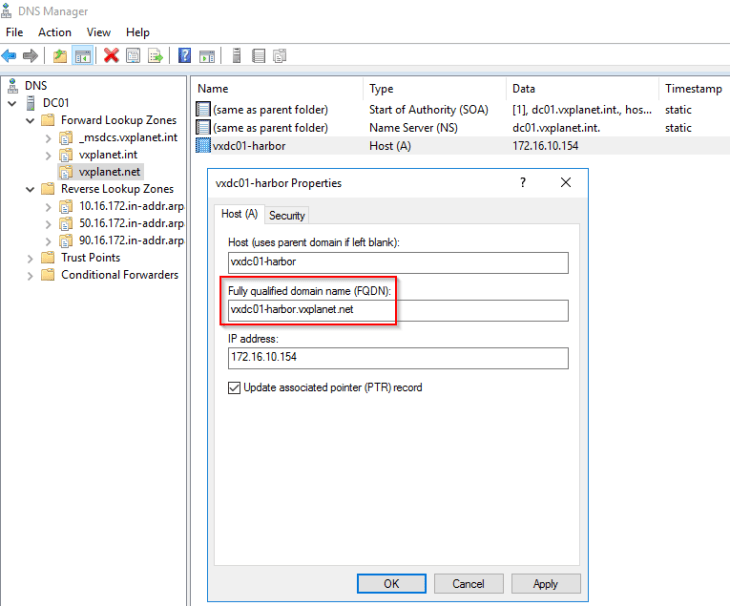
Note that our lab is on “vxplanet.int” zone but we created the Harbor FQDN on a new “vxplanet.net” zone. This is because “.int” TLD is not supported for Harbor.
There are multiple ways to generate a SAN certificate for Harbor, one way is to use the NAPP automation appliance as it has the openssl utility installed. Because I already have NSX ALB (VMware AVI) deployed in my home lab, I will use the AVI console to generate a SAN certificate for Harbor (which is the easiest option for me).
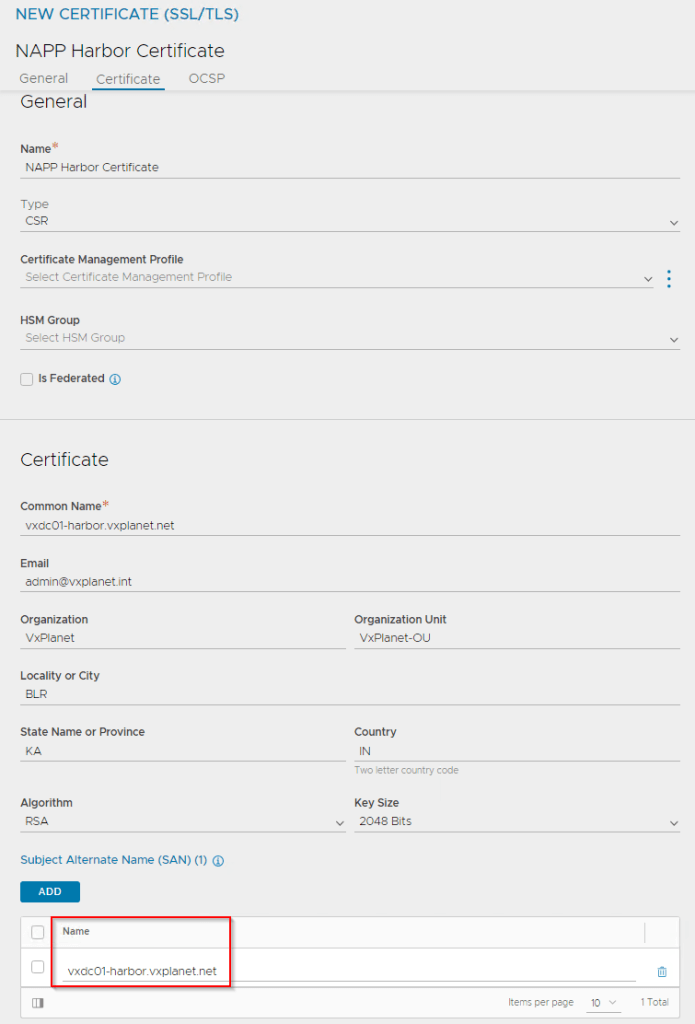
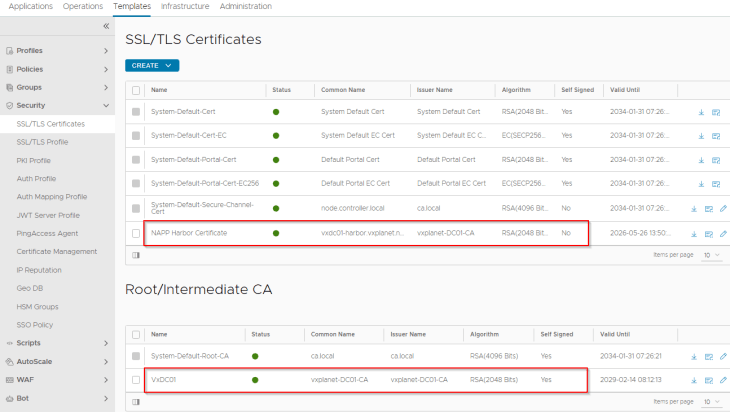
Navigate to Templates -> SSL Certificates and click on “Create Application Certificate”

Make sure the Harbor FQDN is added to the SAN field.
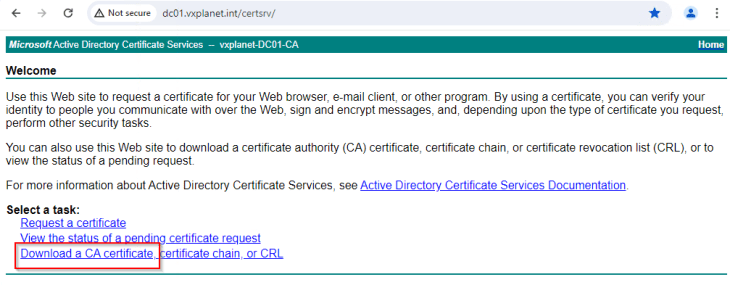
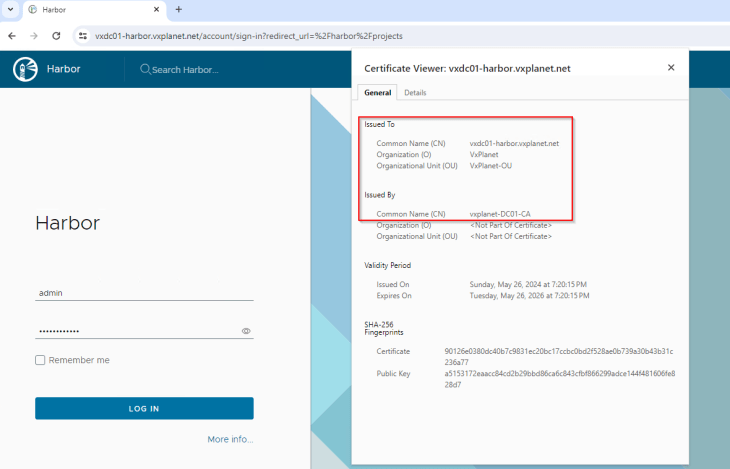
At this moment, the CSR is generated, and we will present this CSR to our internal CA to get it signed. We have Microsoft Certificate Services installed in the home lab, hence we will present this to the internal Microsoft CA.
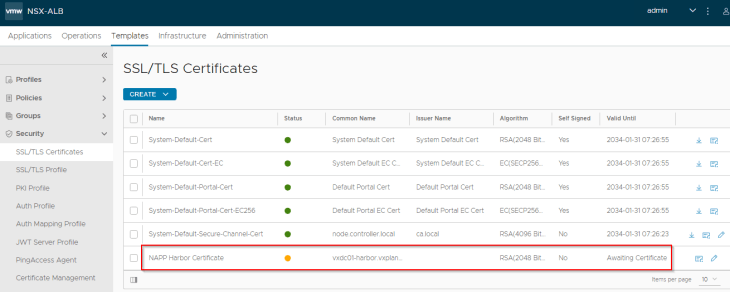


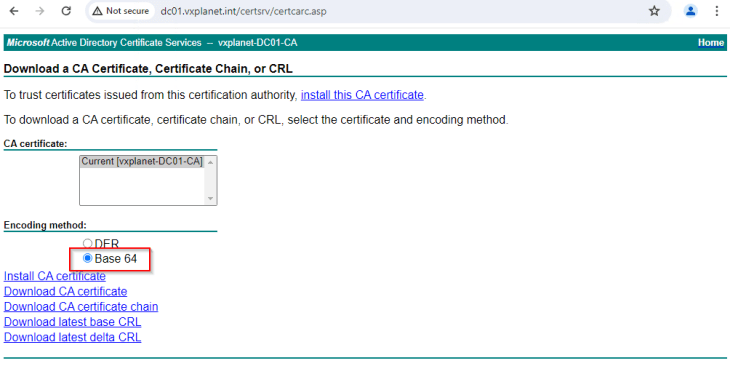
We will download the SAN certificate as a base 64 encoded .crt or .pem file (as this is the only format supported in AVI).

and we will import this to AVI. The SAN certificate status should show as Green as it has the certificate chain included.
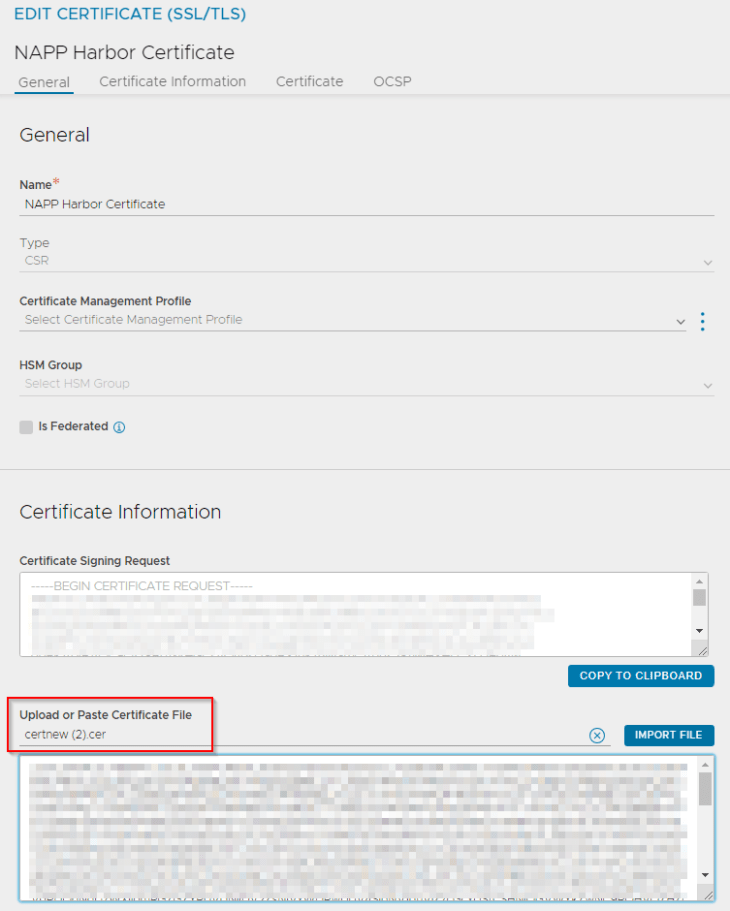
We will now export these certificates in a base-64 encoded format to a file that can be used while we deploy the Harbor appliance.

At this moment, we have three files saved on our desktop:
- SAN certificate for Harbor (in base-64 encoded format)
- Private key of the SAN certificate (in base-64 encoded format)
- Root CA certificate (as a chain if required, in base-64 encoded format)
Deploying Harbor on the management workload domain
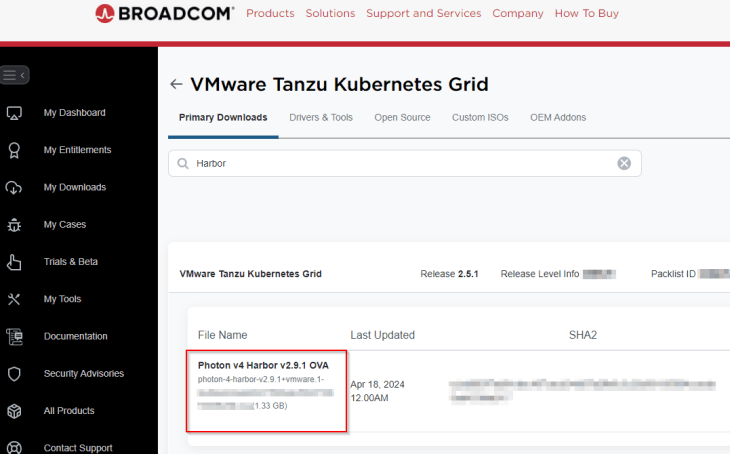
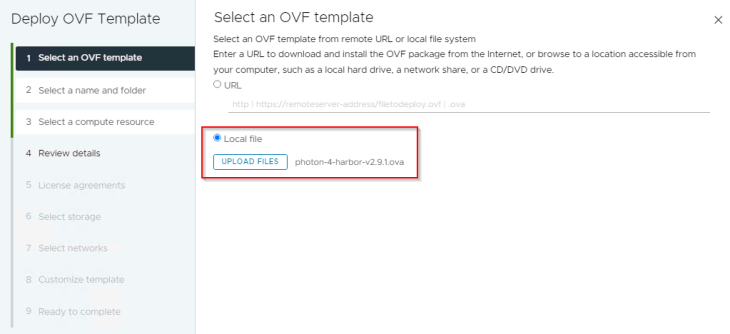
Harbor is available as an ova appliance and can be downloaded from the Broadcom support portal. We will download the recent 2.9.1 version.
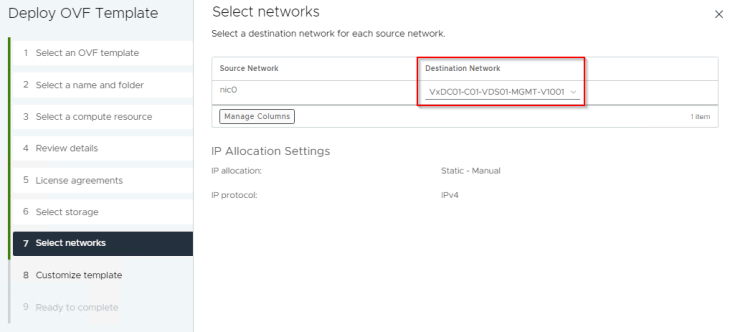
Harbor is deployed on the management workload domain on the management network. In our case this will be the management cluster “VxDC01-C01-MGMT”.
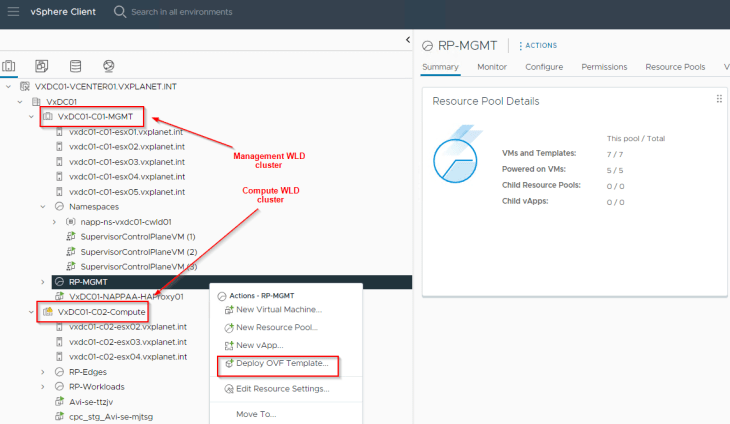
Our management network is “VxDC01-C01-VDS01-MGMT-V1001”
Harbor hostname should exactly match with the SAN name in the certificate. The is the same name that we pre-created in DNS earlier.
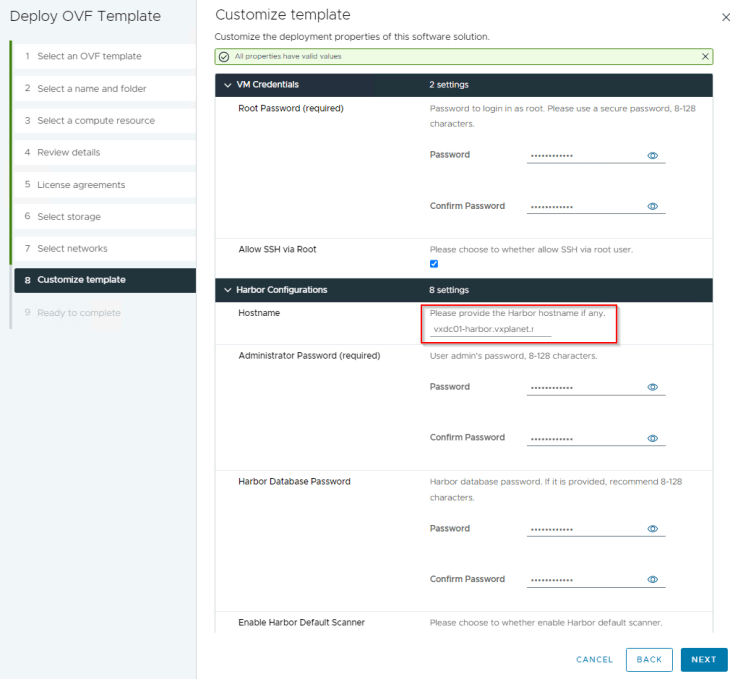
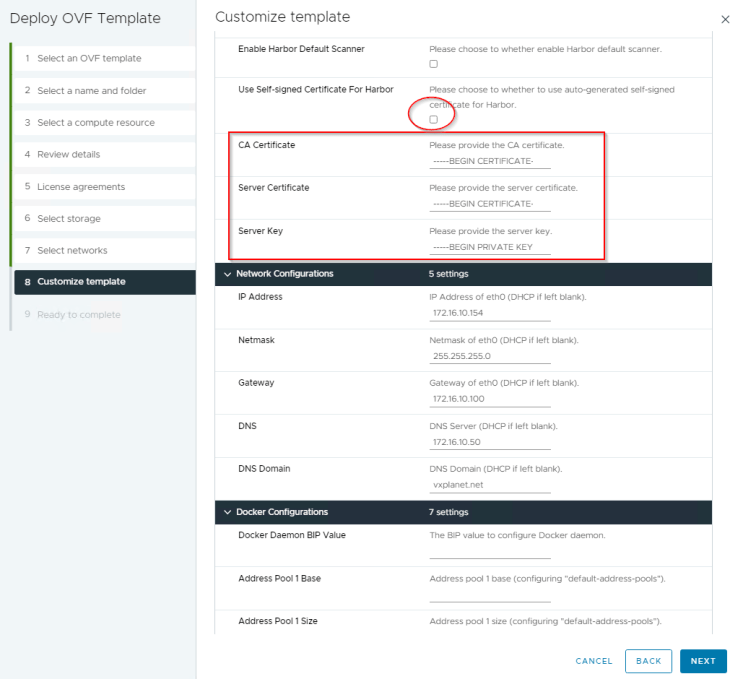
Make sure that the checkbox for “Use Self-signed Certificate for Harbor” is unchecked in the ova properties. Also provide the values for CA Certificate, Server Certificate and Server Key, these values will come from the three files we saved on the desktop earlier.
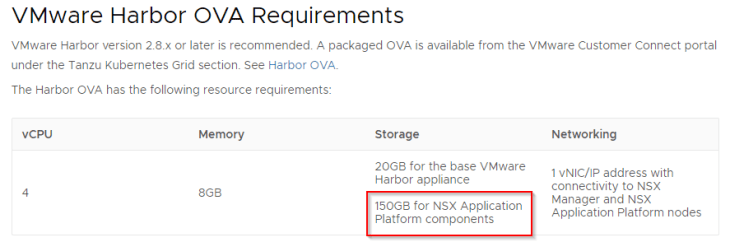
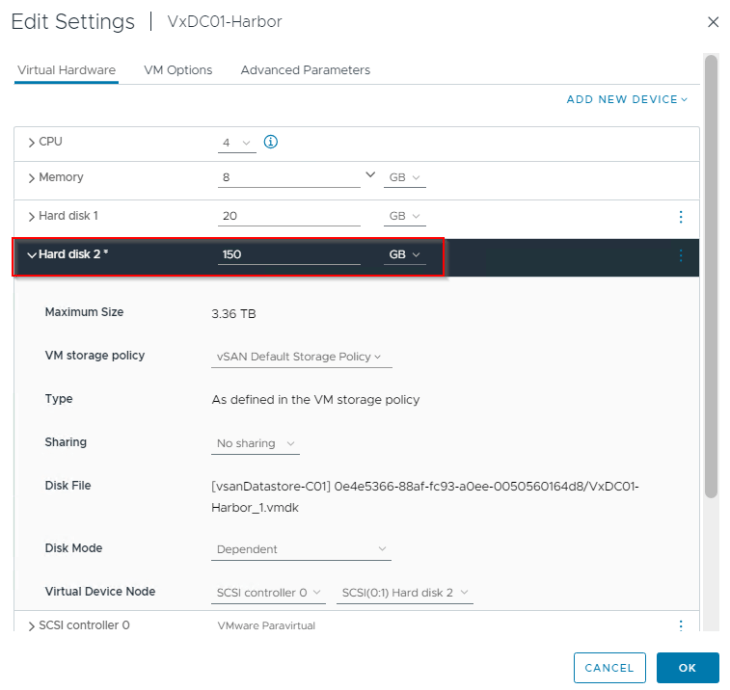
Taken from the official documentation for Harbor requirements for NAPP, we require an additional disk of 150GB on the Harbor VM to store the NAPP images.
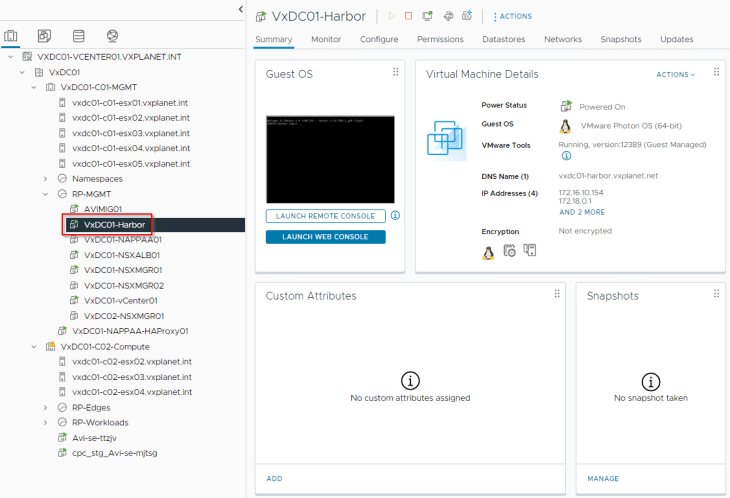
and finally let’s power on the Harbor VM and wait for the Harbor UI to initialize.
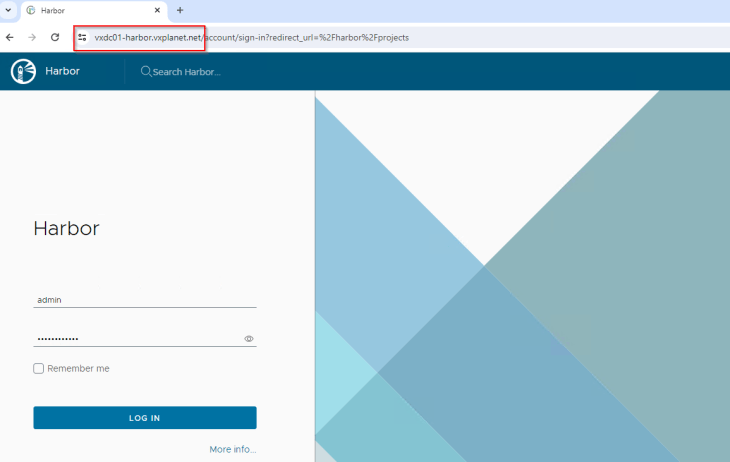
Notice that Harbor has successfully picked by the internal SAN certificate that was supplied, and at this stage the deployment is successful.
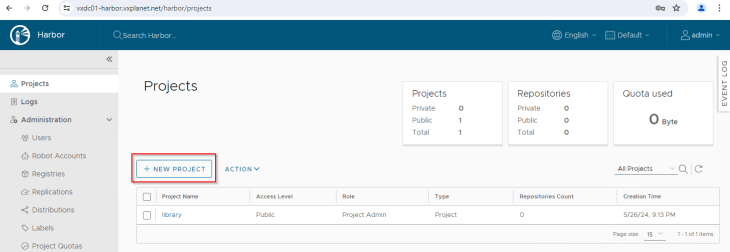
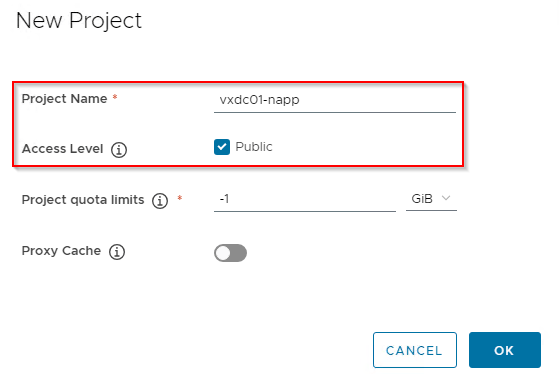
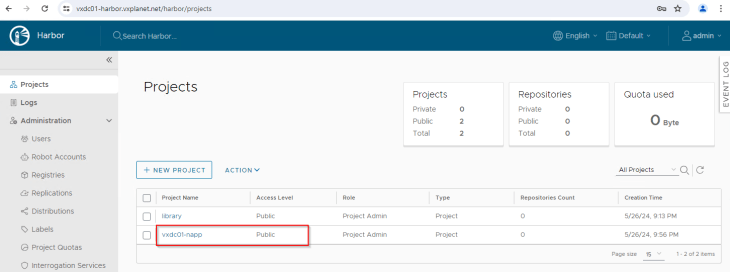
Creating Harbor Project for NAPP
Let’s create a new Harbor project for NAPP with access level set to public. NAPP images will be pushed to this project from where it will be consumed for NAPP deployment.
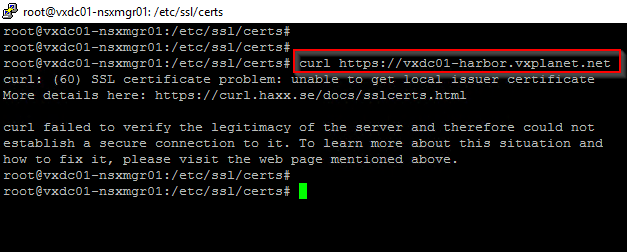
Uploading CA Certificate to NSX manager nodes
NSX manager nodes doesn’t have the CA certificates in their trust store and hence presents a certificate warning while accessing the Harbor registry as shown below:
Let’s upload the CA certificate (which we have already saved as a file on the desktop) to each of the NSX manager node’s trust store (/usr/local/share/ca-certificates) as shown below. Note that this step needs to be done on all the three NSX managers in the cluster.
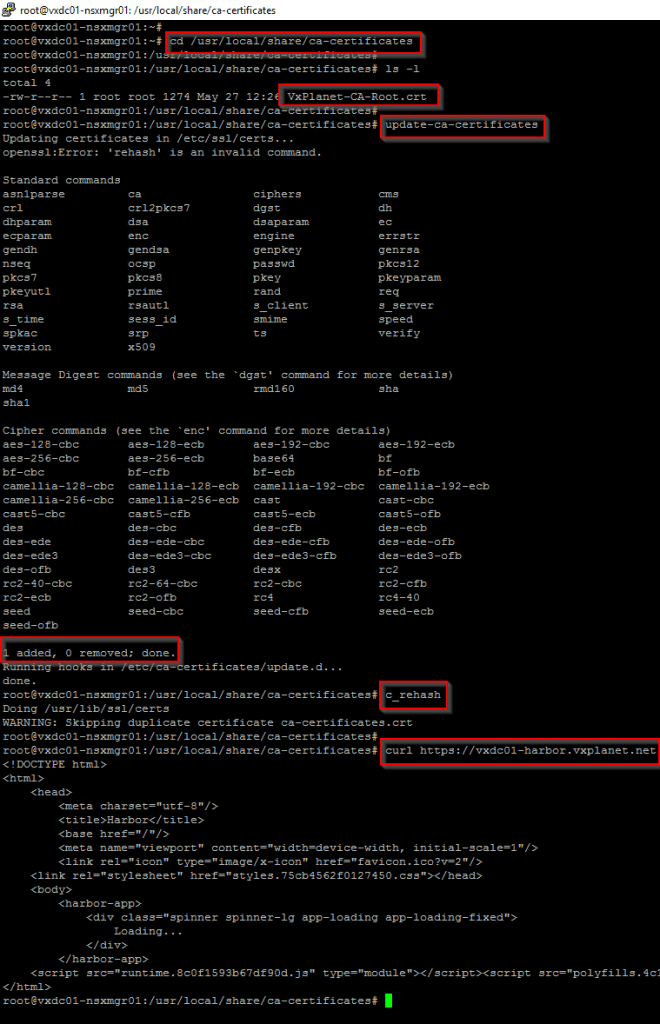
Once the CA certificate is successfully added to the trust store, we should not see any certificate warnings while accessing Harbor from NSX manager.
Uploading CA Certificate to NAPP Automation Appliance
Similarly, NAPP Automation Appliance doesn’t have the CA certificate in it’s trust store and hence presents a certificate warning while accessing the Harbor registry.
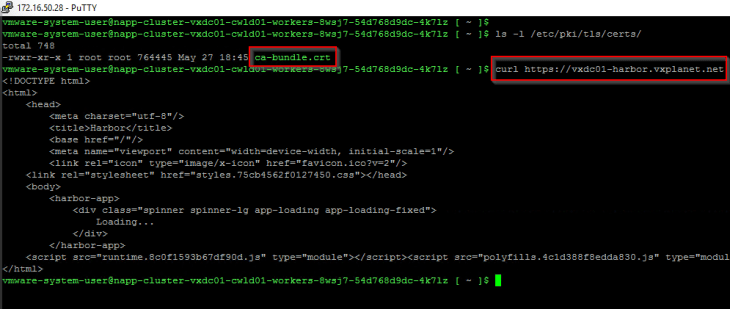
Let’s upload the CA certificate (which we have already saved as a file on the desktop) to the NAPP automation appliance’s trust store (/etc/pki/tls/certs/ca-bundle.crt).
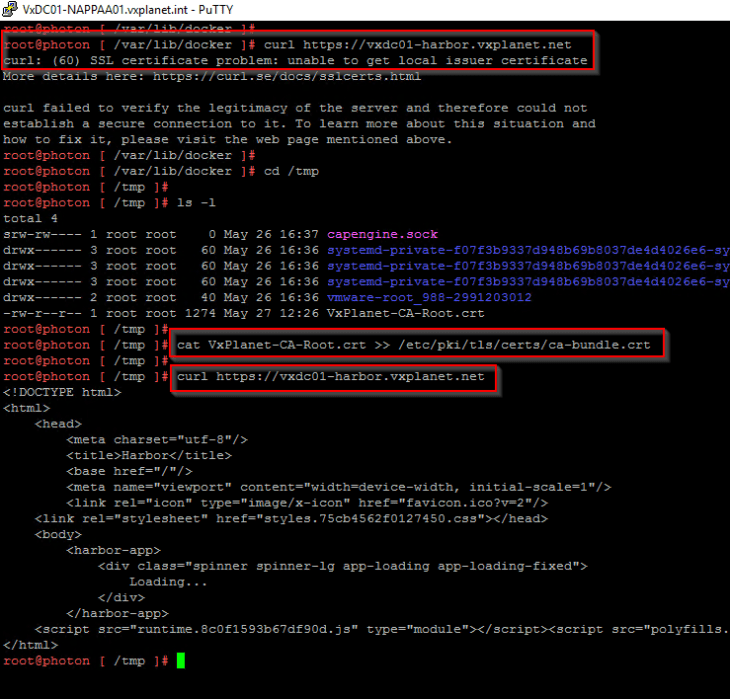
Once the CA certificate is successfully added to the trust store, we should not see any certificate warnings while accessing Harbor from the NAPP automation appliance.
Importing NAPP offline bundle to the NAPP Automation Appliance
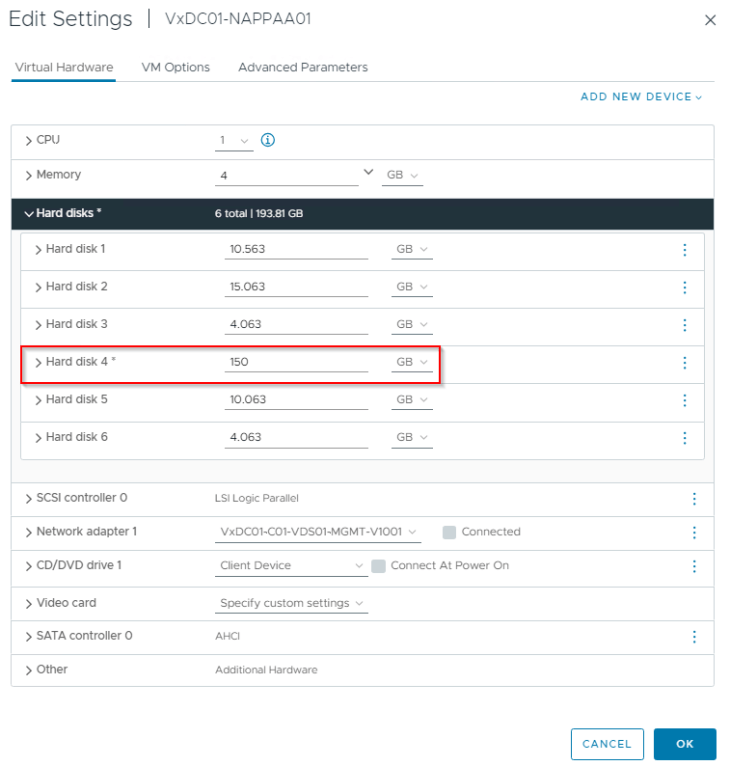
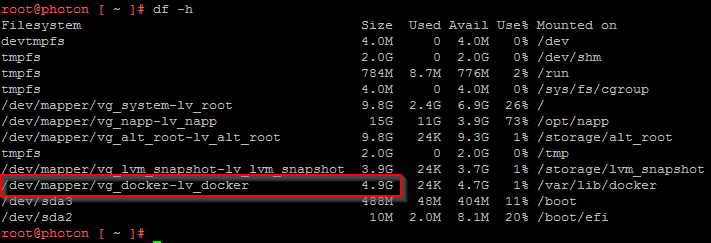
In order to provide room for NAPP offline bundle, we need to resize disk 4 (that maps to logical volume “vg_docker-lv_docker”) in the NAPP Automation Appliance to atleast 150 GB.
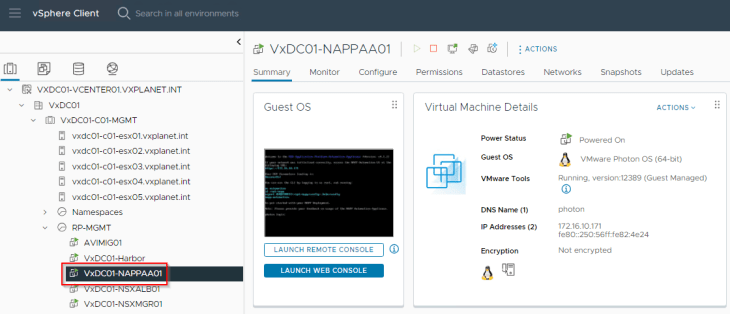
The NAPP Automation Appliance need to be powered down inorder to make this change.
If the resizing is not reflected in the host OS, execute the script “./resize.sh” located under the “/opt/napp” directory of the automation appliance.
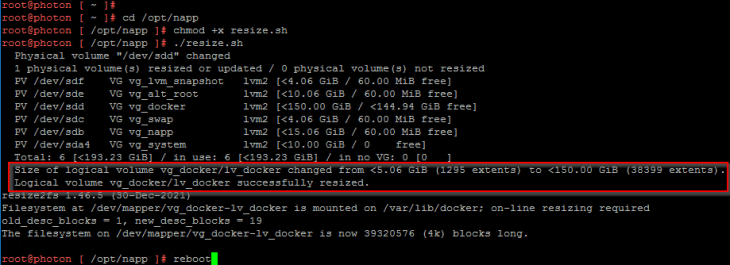
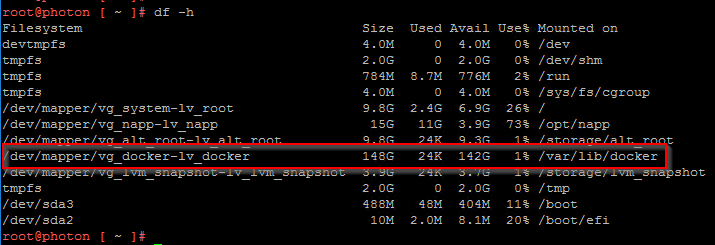
Success!!! Disk is now resized and we are good to import the NAPP offline bundle to the NAPP automation appliance.
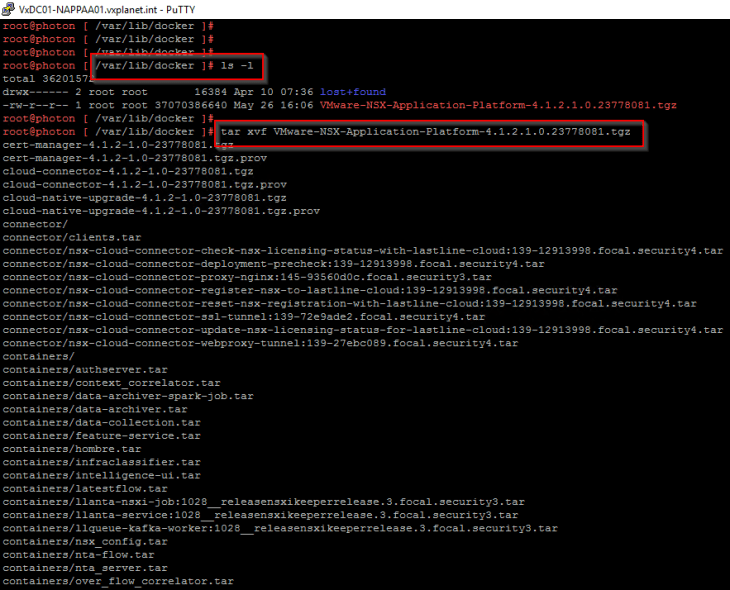
NAPP offline bundle can be downloaded from the Broadcom support portal.

The bundle needs to be imported (eg: WinSCP) and extracted under the “/var/lib/docker” directory.
Uploading NAPP images to the Harbor project
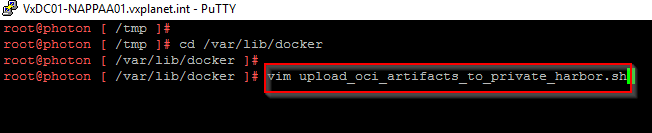
Now that the images are available in the NAPP automation appliance, we will execute the script “./upload_oci_artifacts_to_private_harbor.sh” located under the “/var/lib/docker/” directory to push the images to the Harbor project.
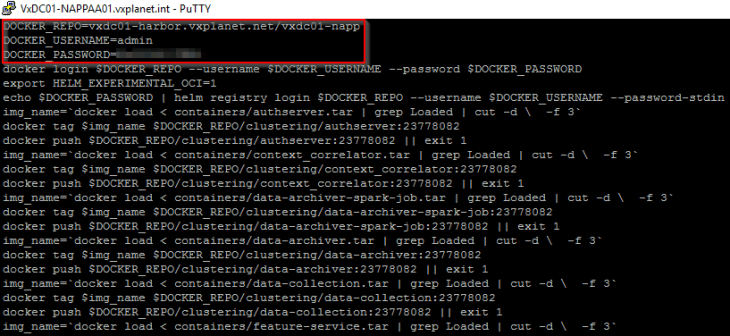
This script needs to be edited to supply the values for “DOCKER_REPO”, “DOCKER_USERNAME” and “DOCKER_PASSWORD”.
DOCKER_REPO=<Harbor FQDN>/<Project>
DOCKER_USERNAME=<username>
DOCKER_PASSWORD=<Password>
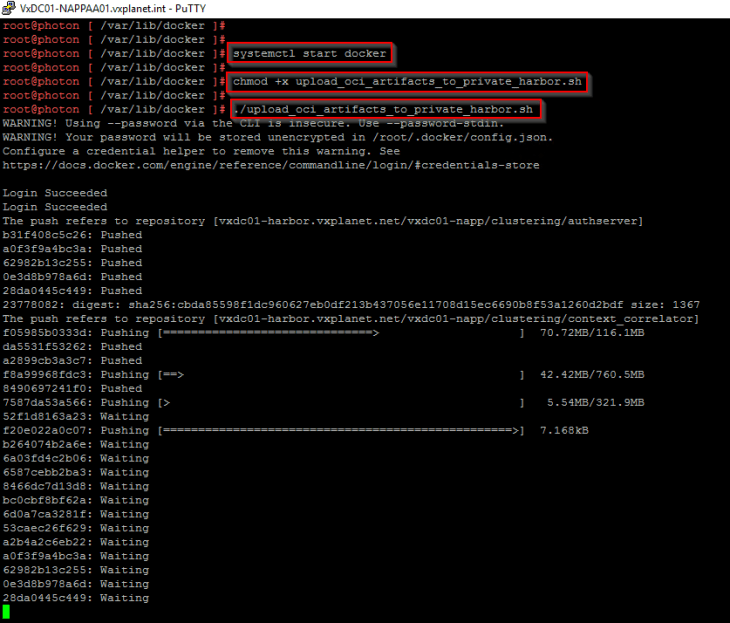
Wait for the push operation to complete, this process might take some time.
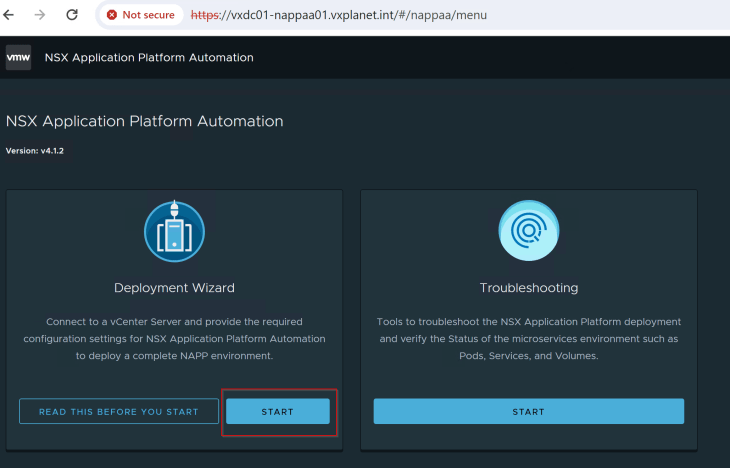
Deploying NAPP using the NAPP Automation Appliance
Now that we have all the NAPP images available locally on the Harbor instance, let’s run the NAPP automation workflow to deploy the NAPP instance.
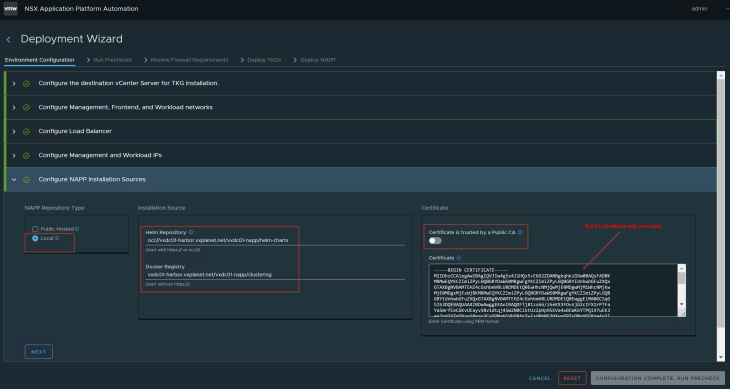
We will jump to step 5 (as the previous values are same as the previous blog posts) and select the NAPP repository type to “local”.
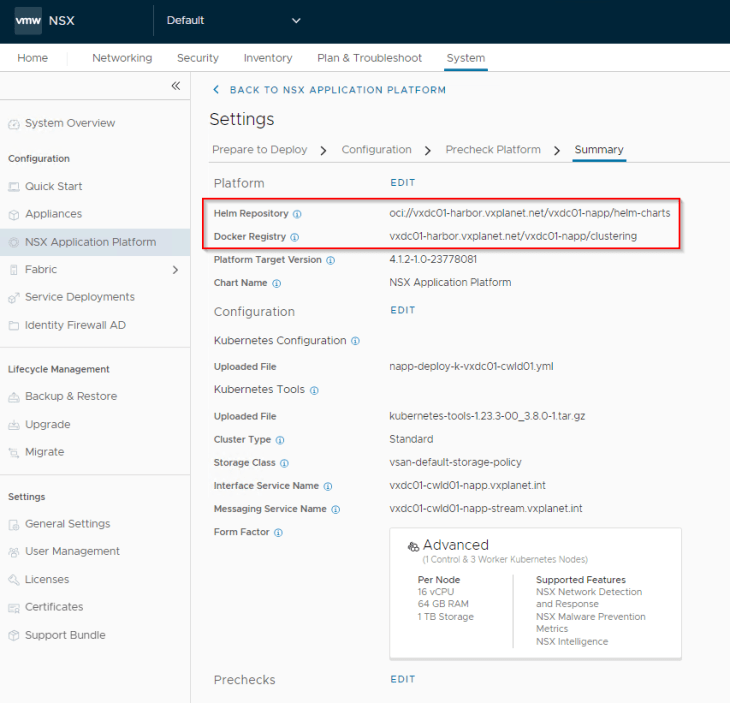
We will input the Helm Repository and Docker Registry fields with the below values of the Harbor instance:
Helm Repository : oci://vxdc01-harbor.vxplanet.net/vxdc01-napp/helm-charts
Docker Registry : vxdc01-harbor.vxplanet.net/vxdc01-napp/clustering
Make sure the checkbox for “Certificate is trusted by public CA” is set to disabled, and the root CA certificate is pasted in the form. The contents will come from the root CA certificate that we saved to the local desktop earlier.
The workflow will push the CA certificate to the local trust store of the TKGS guest cluster worker nodes that are provisioned as part of the workflow. Missing this step will cause the NAPP deployment workflow to fail.
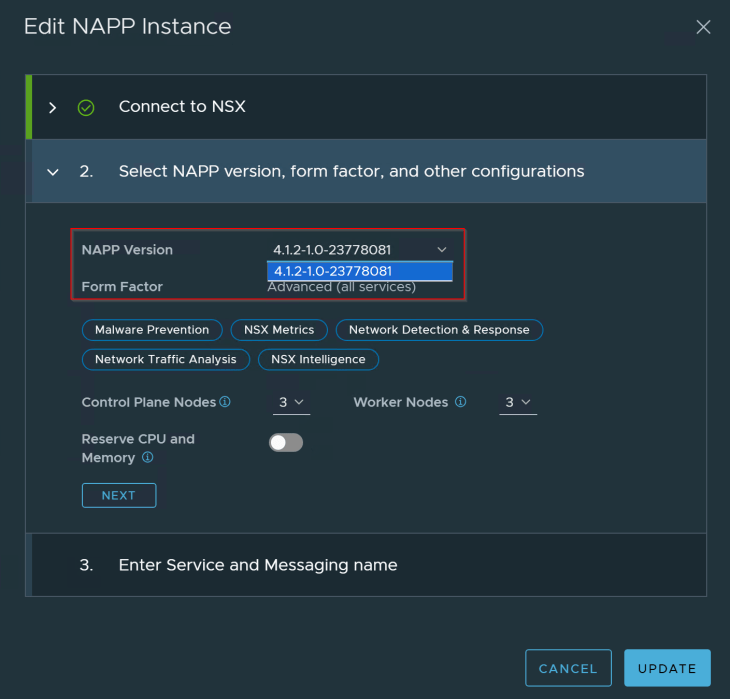
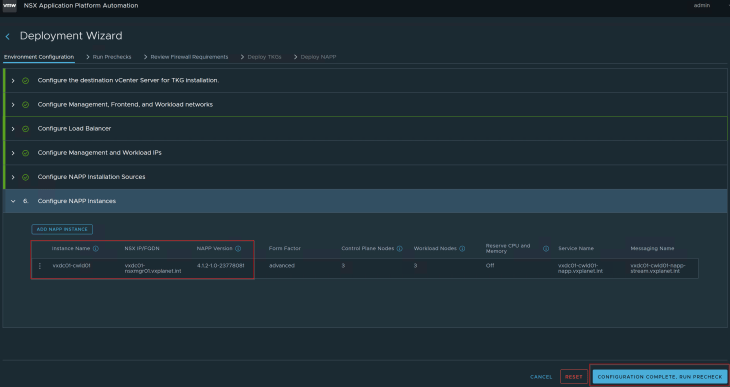
In step 6, edit the NAPP instance and make sure we can select the NAPP version to be deployed. As in previous articles, we will go with minimal number of worker nodes.
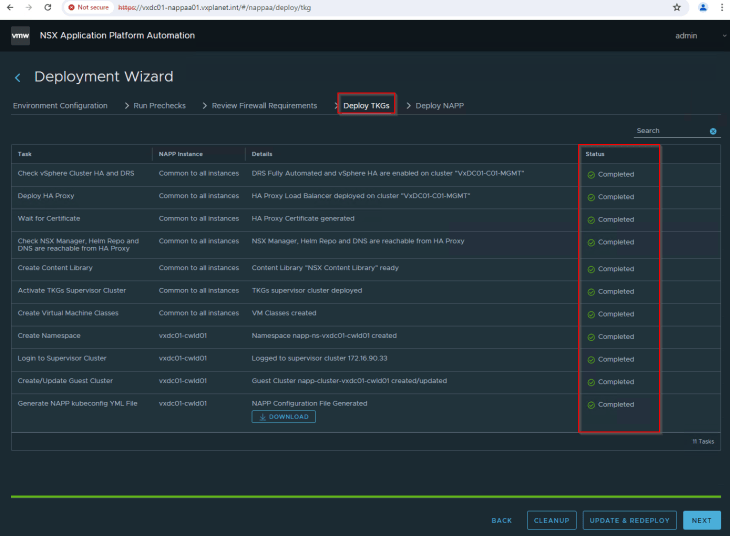
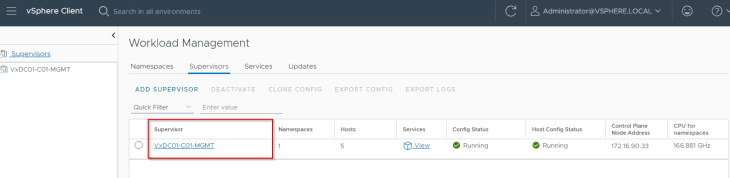
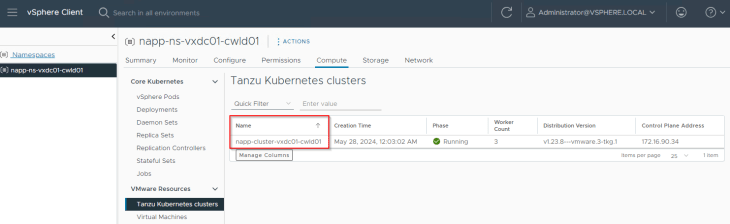
Proceed as usual, we see that the supervisor cluster is configured and the TKGS guest cluster is deployed successfully.

Let’s ssh to one of the TKGS worker nodes and confirm that we can access the Harbor registry.
and if we check the trust store on the TKGS worker node (/etc/pki/tls/certs/ca-bundle.crt), we see that the CA cert is successfully added.
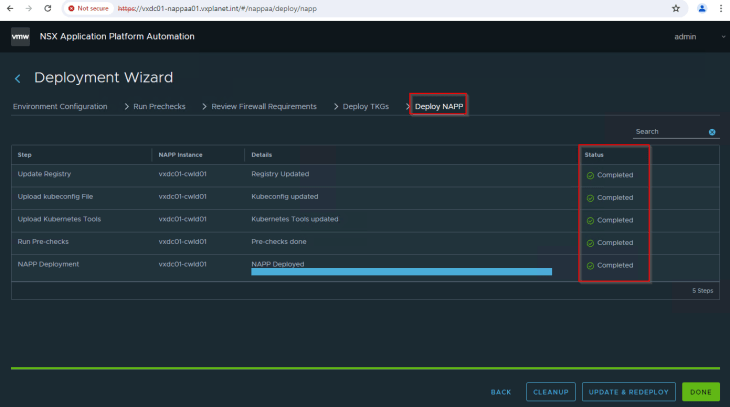
Proceed to NAPP deployment, we should see that the workflow completes successfully.
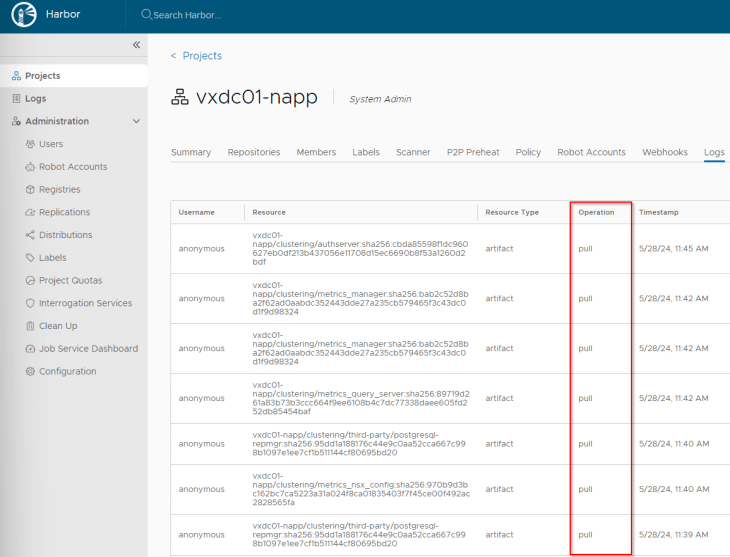
Examining the Harbor logs, we see that the images are pulled successfully.
Examining the pods that are deployed, we see that they are created from the images pulled in from Harbor.

Examining the NAPP dashboard settings, we see that Harbor registry is set as the Helm Repository and Docker Registry.
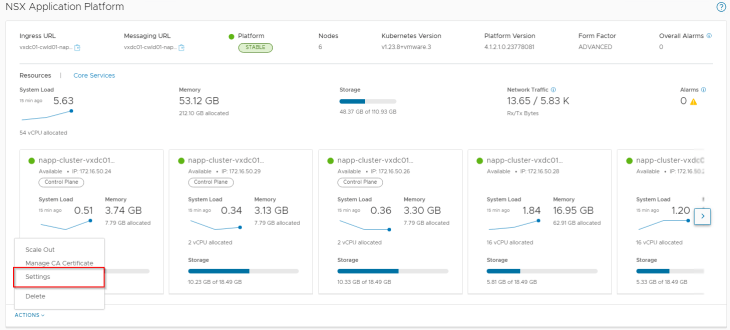
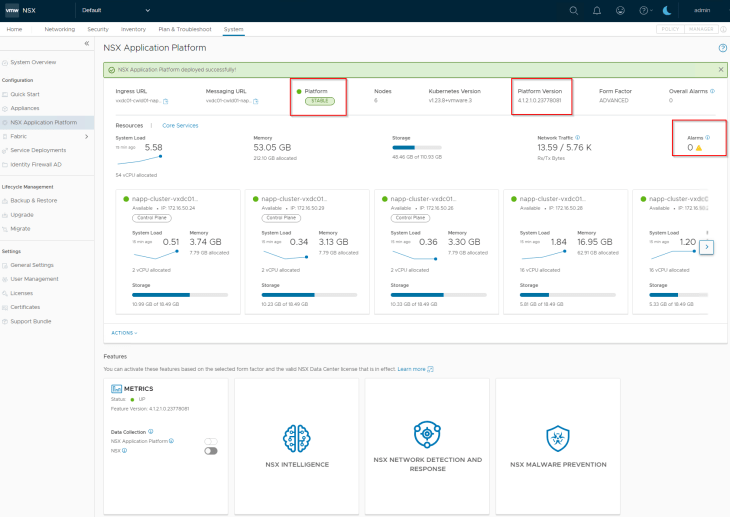
and finally, let’s confirm that the NAPP dashboard shows status as stable and that there are no open alarms.
Now let’s wrap up!!! We covered a lot on NSX Application Platform in this six-part blog series covering NAPP topologies, automation appliance deployment, NAPP single and multiple instance deployment, NAPP scale-out, NAPP upgrade and air-gapped deployments.
I hope this was a very informative series and if you have any suggestions / feedback, please leave a comment or reach out to me directly at hari@vxplanet.com
See you later with a new NSX topic. Stay tuned!!!
If you wish to offer me a coffee, here is my BuyMeACoffee link:

Continue reading? Here are the other parts of this series:
Part 1 – Topology and Appliance Deployment :
https://vxplanet.com/2024/04/16/nsx-application-platform-automation-appliance-napp-aa-part-1-topology-and-appliance-deployment/
Part 2 – NAPP Instance Deployment :
https://vxplanet.com/2024/04/18/nsx-application-platform-automation-appliance-napp-aa-part-2-napp-instance-deployment/
Part 3 – Deploying multiple NAPP Instances :
https://vxplanet.com/2024/04/20/nsx-application-platform-automation-appliance-napp-aa-part-3-deploying-multiple-napp-instances/
Part 4 – NAPP Scale-Out :
https://vxplanet.com/2024/04/20/nsx-application-platform-automation-appliance-napp-aa-part-4-napp-scale-out/
Part 5 – NAPP Upgrade :
https://vxplanet.com/2024/07/06/nsx-application-platform-automation-appliance-napp-aa-part-5-napp-upgrade/


