Defining tags and security boundaries (virtual zones)
Based on the design decisions we developed in Part 1, we will use security tags to achieve dynamic group membership. Below table shows the security tags that we will create to match environments, applications and app-tiers. Using a combination of multiple tags using the “AND” operator, we will define security boundaries or virtual zones at the necessary depth (app, app-tiers or down at the individual VMs).
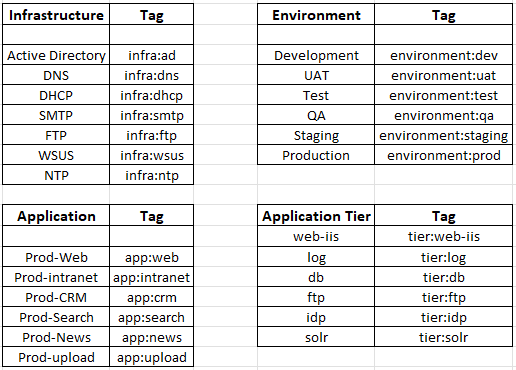
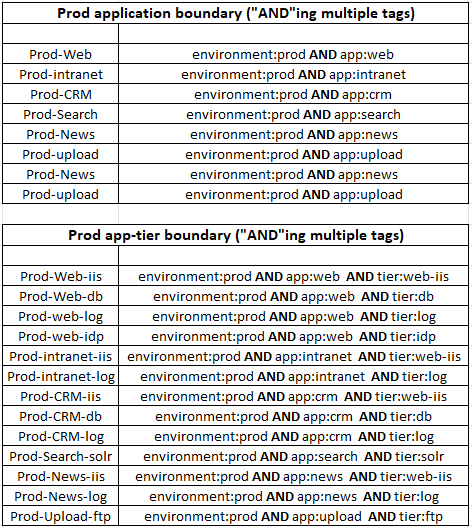
Setting up the security tags
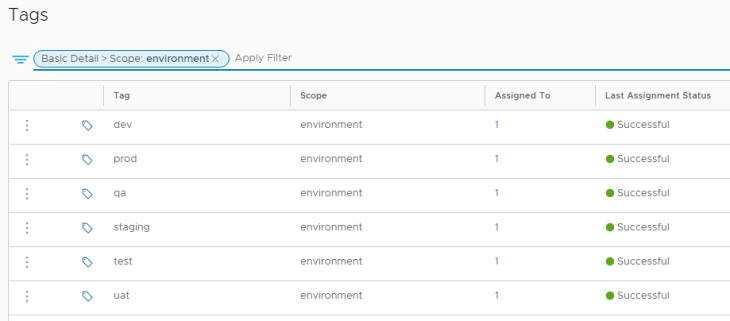
Now let’s create the necessary security tags in NSX manager. The below tags are for scope “environment”
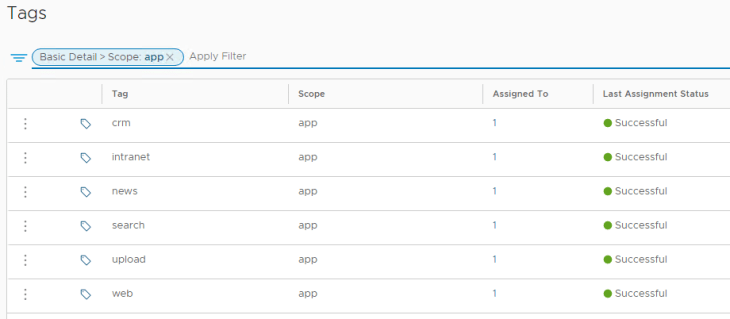
The below tags are for the scope “app”
The below tags are for the scope “tier”

The below tags are for the scope “infra”

Note: To simplify manageability, we are using combinations of multiple tags as match conditions instead of combined tags. However the decision is completely dependent on scenarios and use cases.
Setting up dynamic security groups
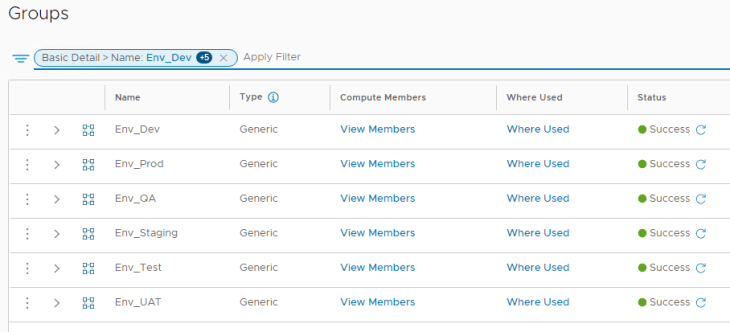
The below security groups define boundary for different environments using the respective tags from the scope “environment”. The below example shows a Prod environment boundary (or Prod security zone) by matching the tag “prod” for scope “environment”.

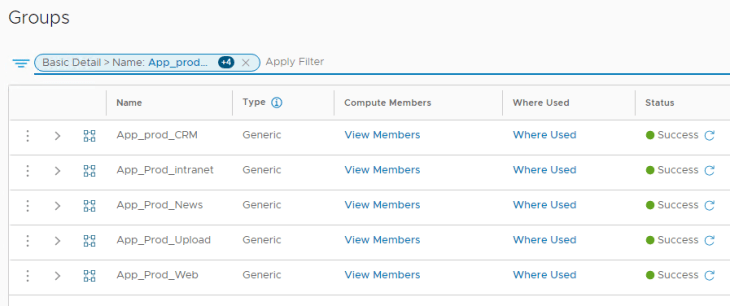
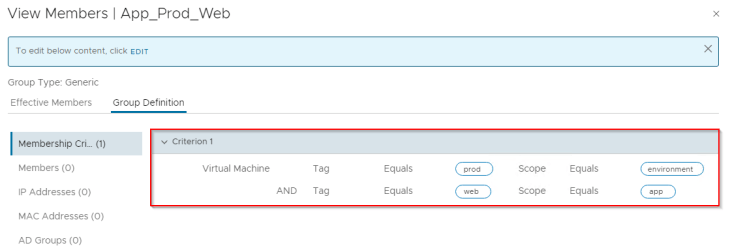
Since our microsegmentation use case is only for Prod environment, we will create additional security groups to define prod application boundaries. The below example shows the boundary for Prod Live website by matching the tag “prod” for scope “environment” AND tag “web” for scope “app”.
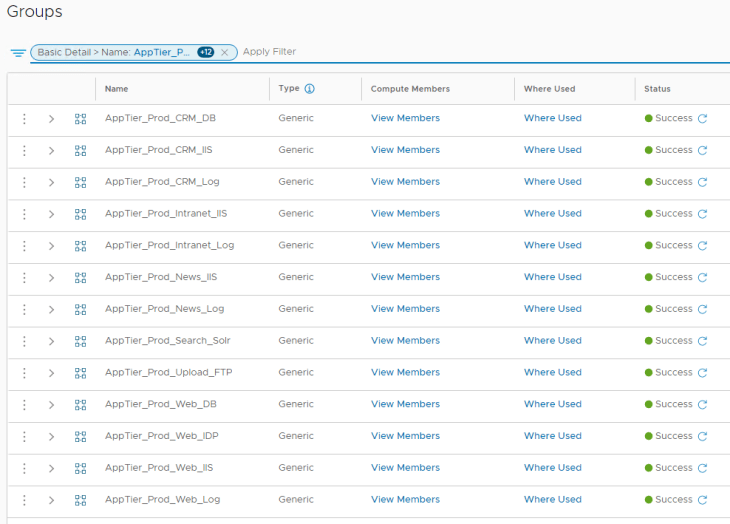
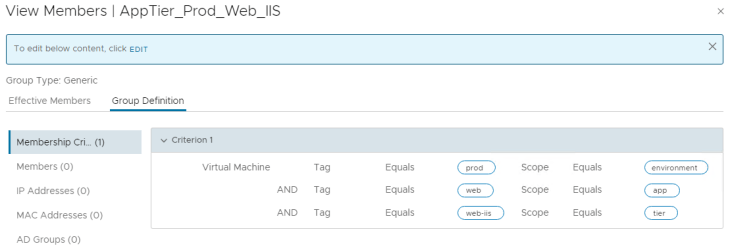
Next, we create security groups to define prod app-tier boundaries. The below example shows the boundary for Prod Live website web-tier by matching the tag “prod” for scope “environment” AND tag “web” for scope “app” AND tag “web-iis” for scope tier.
We will also define security groups for infrastructure VMs using the respective tags from the scope “infra”. The below example groups infrastructure DNS servers by matching the tag “dns” for scope “infra”.
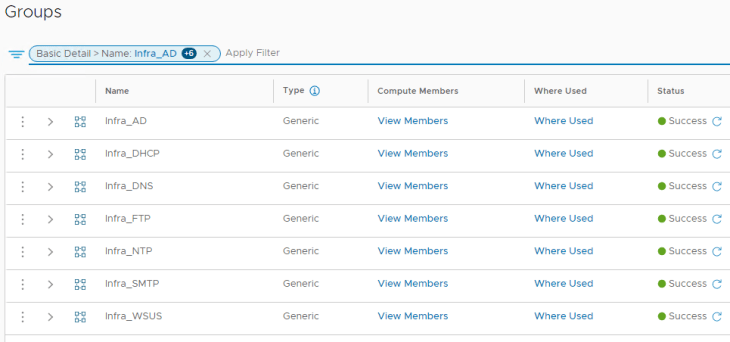

Note: To simplify manageability, we are not using security group nesting. Again the decision is completely dependent on scenarios and use cases.
Setting up the policy rules
Now that we have the security zones defined, we will now create the security policies across categories – Emergency, Infrastructure, Environment and Application. Rules are evaluated from left to right across categories. Within a category, rules are evaluated from top to bottom.
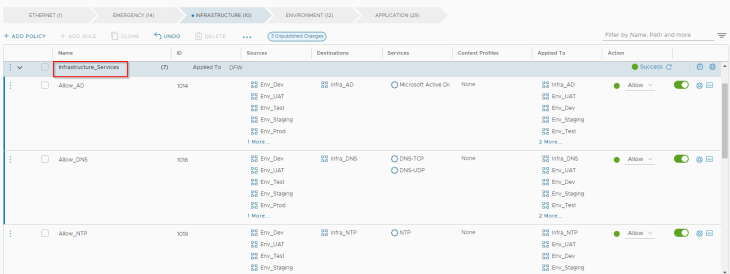
Restricting management access to workloads was one of the requirements and a design decision we made in Part1. Let’s add this policy under “Infrastructure” category

All environments require access to common infrastructure services. The below policies accomplish this.
Defining security boundary (zone fencing) was a requirement and we add the policies under “Environment” category. All non-prod will need unrestricted access within their environment. We need to microsegment prod environment, so any traffic hitting the prod environment rule will need to jump to “Application” category to look for more specific app and app-tier policies.

All environments need internet access but should be restricted from accessing other environment’s applications. The below rule accomplishes this.

Next, we define more-specific polices, ie intra-tier and inter-tier policies for the prod applications. This will be created under the “Application” category. Remember the prod fencing diagram we created in Part 1.
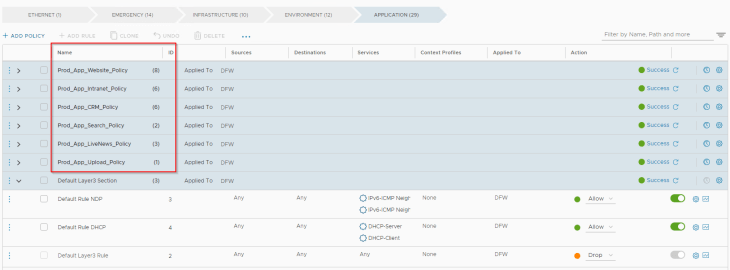
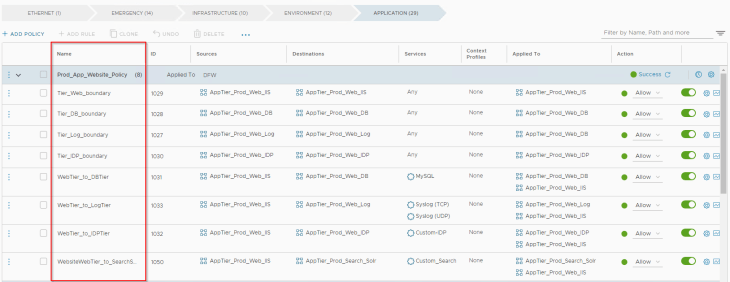
The below policy is for the Prod-livewebsite application. We define boundaries around each tier and also define policies to talk between tiers and to tiers of other dependent prod applications.
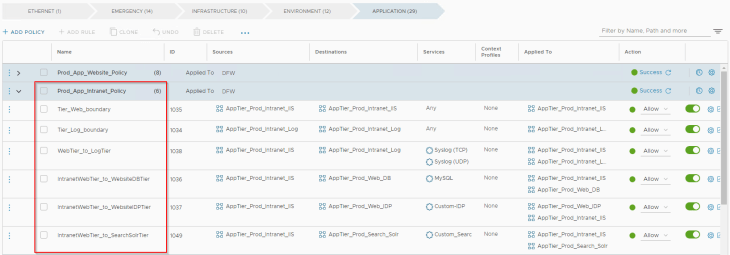
The below policy is for the Prod-intranet application to talk within tiers and also to tiers of other dependent prod applications.
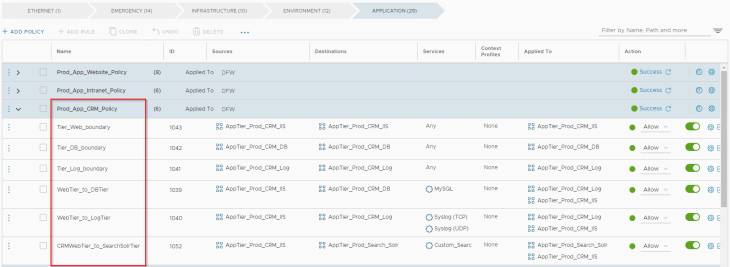
The below policy is for the Prod-CRM application to talk within tiers and also to tiers of other dependent prod applications.
The below policy is for the Prod-Search application to talk within tiers and also to tiers of other dependent prod applications.

The below policy is for the Prod-LiveNews application

The below policy is for the Prod-Upload application

We end up with a default rule of “Drop” or deny everything else.

The last requirement was to set up an easy way to quickly lock down an environment in case of a security incident. This is accomplished using the below policies under the “Emergency” category. Note that we need two rules within a policy – one for restricting inbound access and the other for restricting outbound access. These policies will need be in a disabled state. This is because Emergency category is evaluated before all other categories


Now that’s a wrap!!!
I hope the article was informative.
Thanks for reading.
Continue reading? Here are the other parts of the series:
Part 1: https://vxplanet.com/2022/11/30/nsx-microsegmentation-part-1-developing-the-architecture/
