In my previous blog post, we discussed the new version release of my community python project – NSX ALB Virtual Service Migrator v1.3 where we introduced a new capability to migrate TLS-SNI and Enhanced Virtual Hosting (EVH) across cloud accounts in NSX ALB. If you missed it, please check it out below:
If you would like to understand TLS SNI hosting in NSX ALB, please check out my two-part series which I wrote earlier last year.
Part 1: https://vxplanet.com/2022/01/21/tls-sni-virtual-service-hosting-in-nsx-advanced-loadbalancer-avi-vantage-part-1/
Part 2: https://vxplanet.com/2022/02/05/tls-sni-virtual-service-hosting-in-nsx-advanced-loadbalancer-avi-vantage-part-2/
Now let’s use the NSX ALB Virtual Service Migrator V1.3 utility to demonstrate migration of TLS-SNI and EVH hosting from one cloud account to another.
Let’s get started:
Current NSX ALB environment
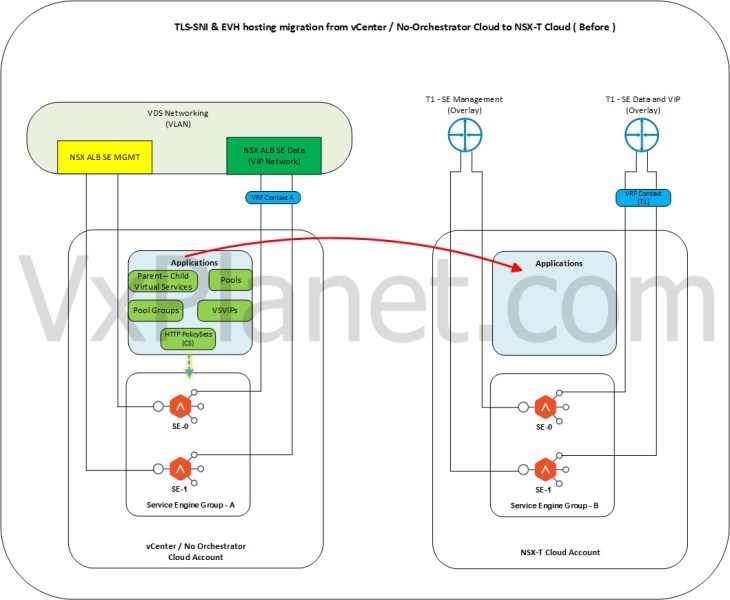
In our home lab environment, we have three hosted virtual services across two cloud accounts – vCenter write access and No-Orchestrator cloud. The workloads are getting transitioned to overlay networking in NSX-T, and so are the hosted virtual services. Because the service engines hosting the virtual services are glued to the specific cloud account, they can’t be migrated to NSX-T cloud. Hence new service engines will be deployed under NSX-T cloud account and the virtual service hosting will be migrated to NSX-T cloud.
Below sketch shows the current state of SNI and EVH virtual service hosting before migration.
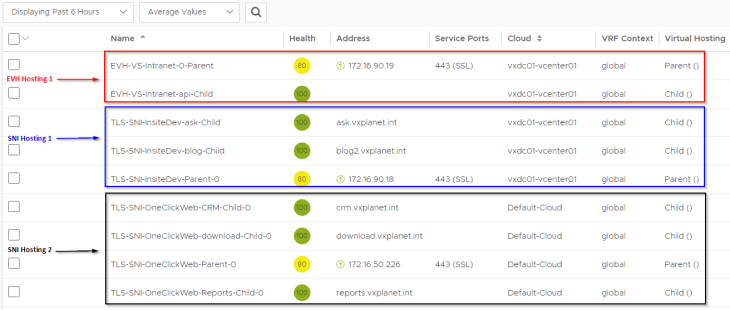
Below table lists the SNI and EVH hosting details.
SNI and EVH hosting is implemented as Parent-Child virtual services in NSX ALB. The Parent virtual service holds the VIP and service ports. Child virtual services handle the traffic after successful SNI matching (for SNI hosting) or host header matching (for EVH hosting). For this blog post, the virtual services are configured with pools, pool groups, content switching HTTP policies and multiple policies and profiles. The backend pool members are reached via L2 and L3.

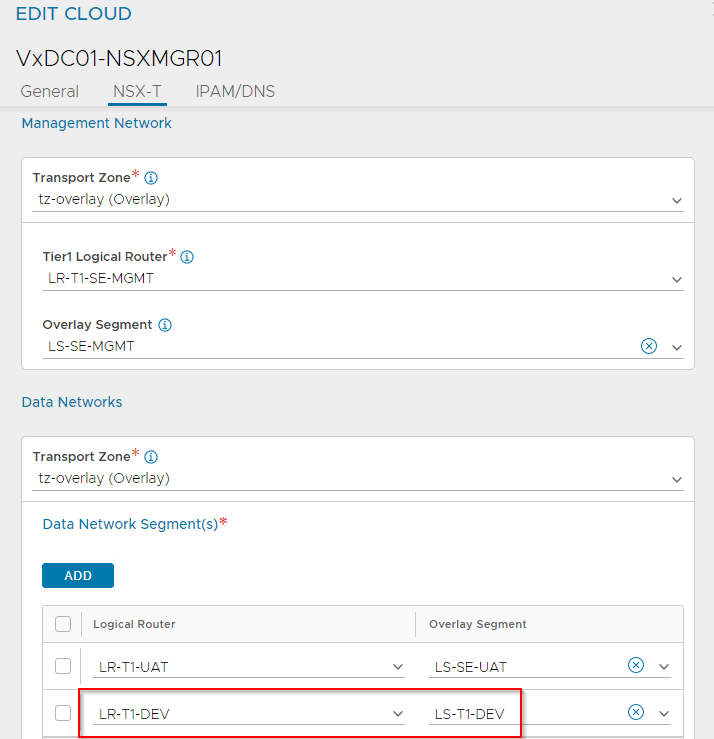
The target NSX-T cloud is already configured, and the service engines are deployed.

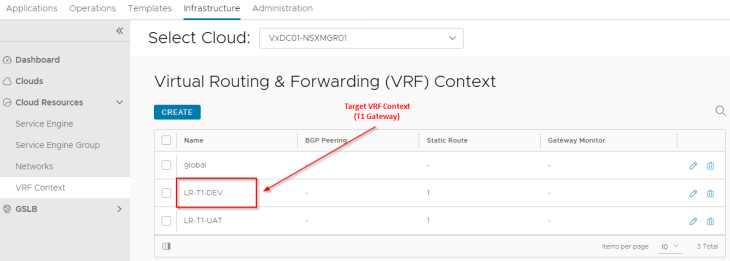
The NSX-T cloud has multiple data networks (T1 VRFs) configured, but our destination will be LR-T1-DEV.
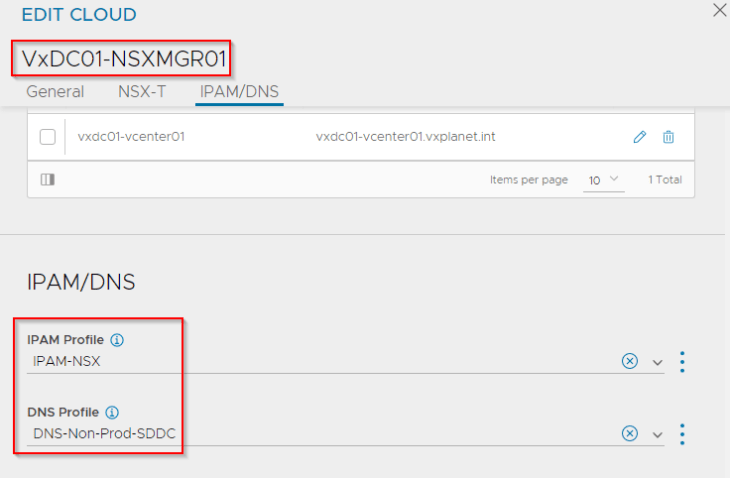
The cloud account has both IPAM and DNS profile configured.
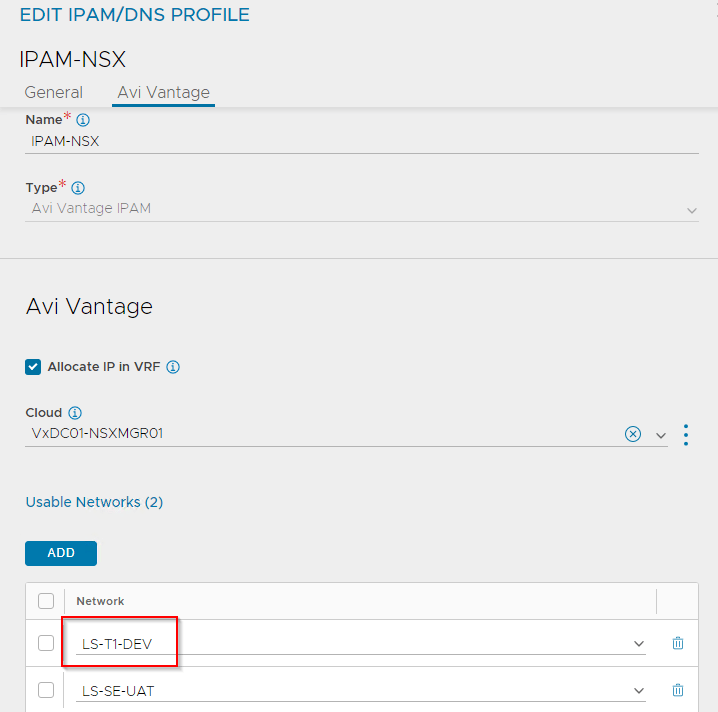
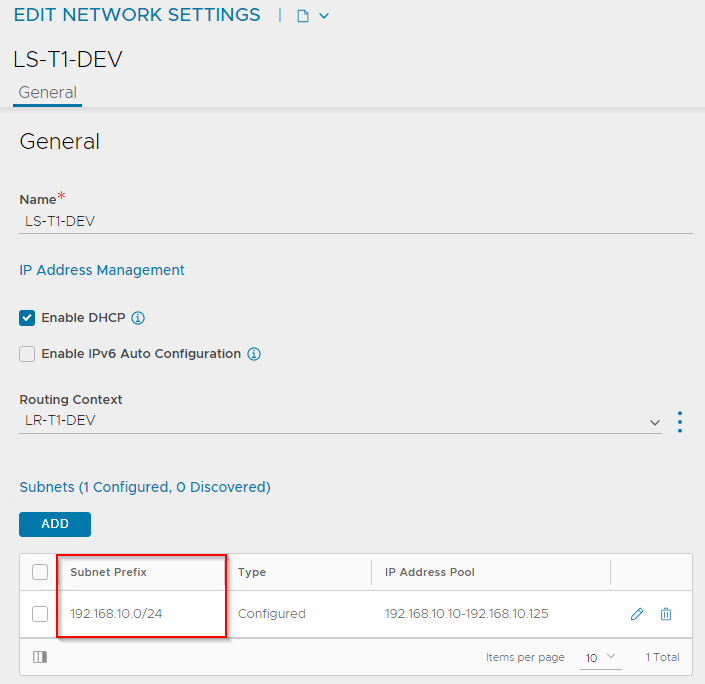
The IPAM network corresponds to the data network under the VRF Context LR-T1-DEV.
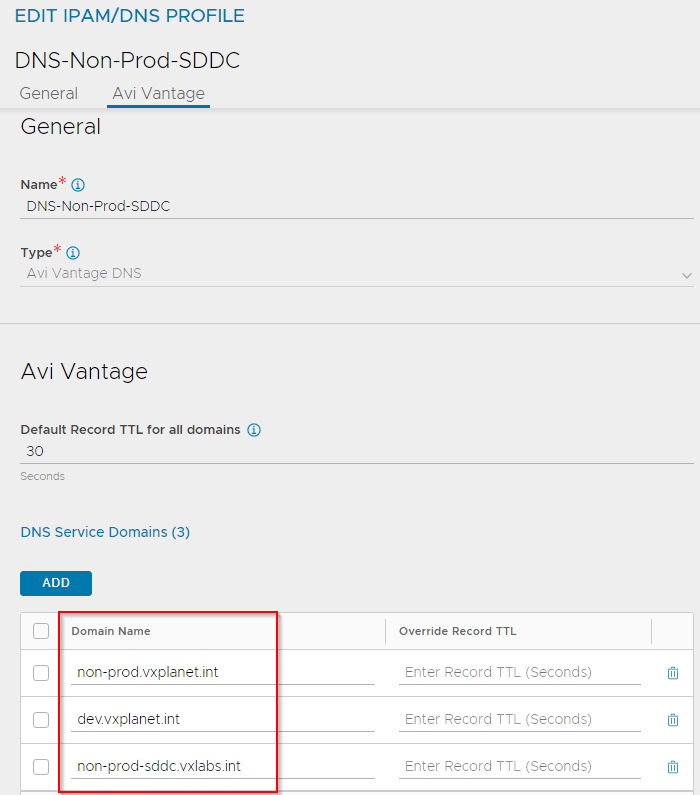
The NSX-T Cloud has the below sub-domains in the DNS profile which can be used for the migrated virtual services. If the application FQDNs doesn’t need to change, we can add the DNS subdomains from the source cloud accounts. The migration tool will retain the DNS names or create new, if DNS names are not found. Note that the DNS FQDNs are associated to VIPs and the VIPs are mapped only to Parent virtual services.
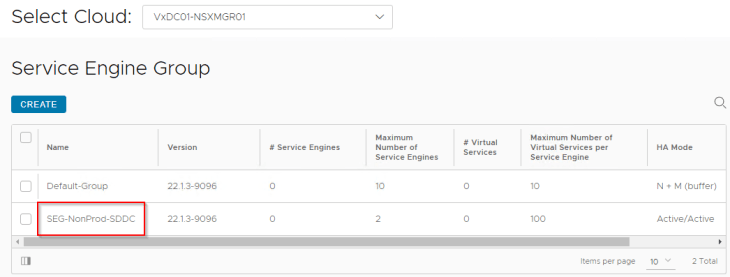
And lastly, we have a service engine group created in NSX-T cloud where new service engines are deployed to host the migrated virtual services.
The below table lists the SNI and EVH hosted virtual service infrastructure specs at the target NSX-T cloud, post migration.

Migrating SNI & EVH hosting using NSX ALB Virtual Service Migrator v1.3
Now let’s use the NSX ALB Virtual Service Migrator v1.3 utility to migrate the SNI & EVH hosting to NSX-T Cloud account.
The project and related artifacts are now available in my Github repository:
Repository : https://github.com/harikrishnant/NsxAlbVirtualServiceMigrator
ReadMe : https://github.com/harikrishnant/NsxAlbVirtualServiceMigrator/blob/main/README.md
Release Notes : https://github.com/harikrishnant/NsxAlbVirtualServiceMigrator/blob/main/RELEASENOTES.md
Assuming that you have gone through the usage instructions in the ReadMe, we require a Linux/Windows VM with Python3 and few modules (requests, urllib3, tabulate, pandas) installed.
We will clone the repository and navigate to NsxAlbVirtualServiceMigrator/V1.3/ and launch the help menu.

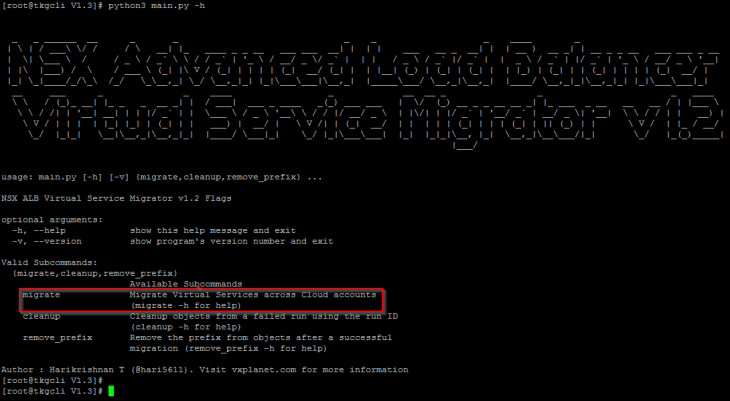
Let’s review the migrate mode flags:
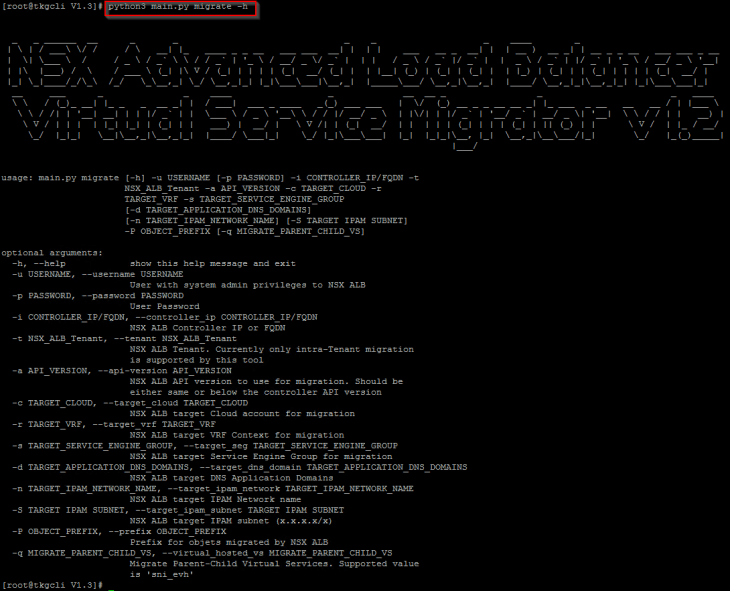
We will now start the migration by running the tool in migrate mode. Flag description is as below:
-i : NSX ALB Controller cluster IP / FQDN
-u : NSX ALB system admin user name
-p – NSX ALB system admin user password
-t : NSX ALB Tenant. Our applications are currently in “admin” tenant
-a : NSX ALB API version. Our controller is on version 22.1.3
-c : Target cloud account (our NSX-T cloud is “VxDC01-NSXMGR01”)
-r : Target VRF Context (our destination is LR-T1-DEV)
-s : Target SE Group (our destination is SEG-NonProd-SDDC)
-d : List of target application domains
-n : Target IPAM network (our’s is LS-T1-DEV)
-S : Target IPAM subnet (our’s is 192.168.10.0/24)
-P : Prefix for migrated objects (This will be the unique run ID for this migration job)
-q : Switch to Parent-Child virtual services migration mode. Supported value is “sni_evh”
The new parameter “-q” or “–virtual_hosted_vs” will switch the migration mode to support SNI & EVH hosting (Parent-Child virtual services). Do not use this parameter if you want to migrate virtual services of type “Normal”.

The tool will now run workflows for initializing class objects and attributes for cloud accounts, VRF contexts, service engine groups, pools, pool groups, HTTP Policy sets, IPAM profiles, VSVIPs and more.
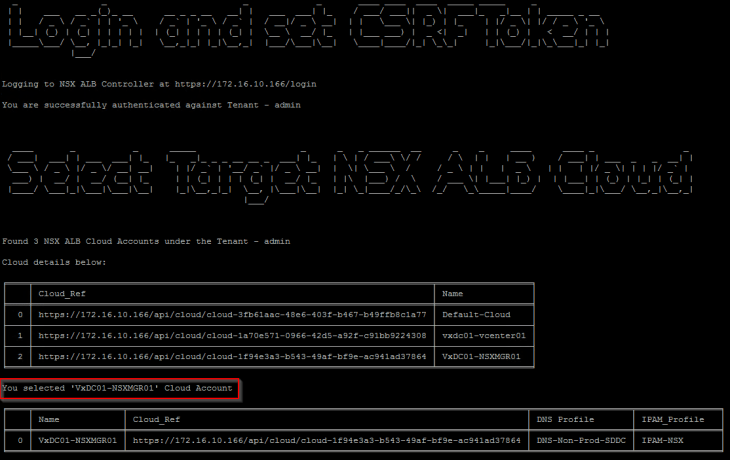
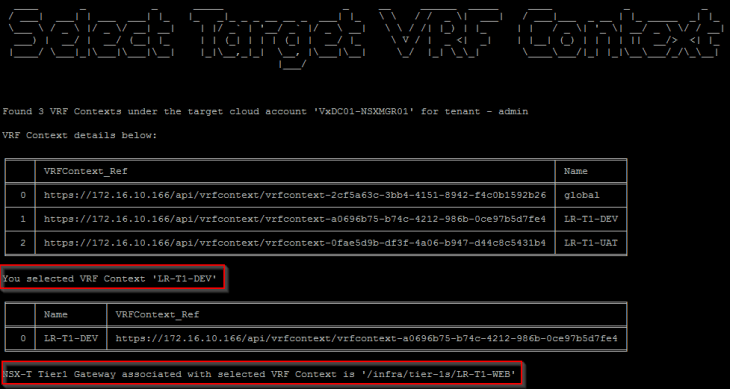
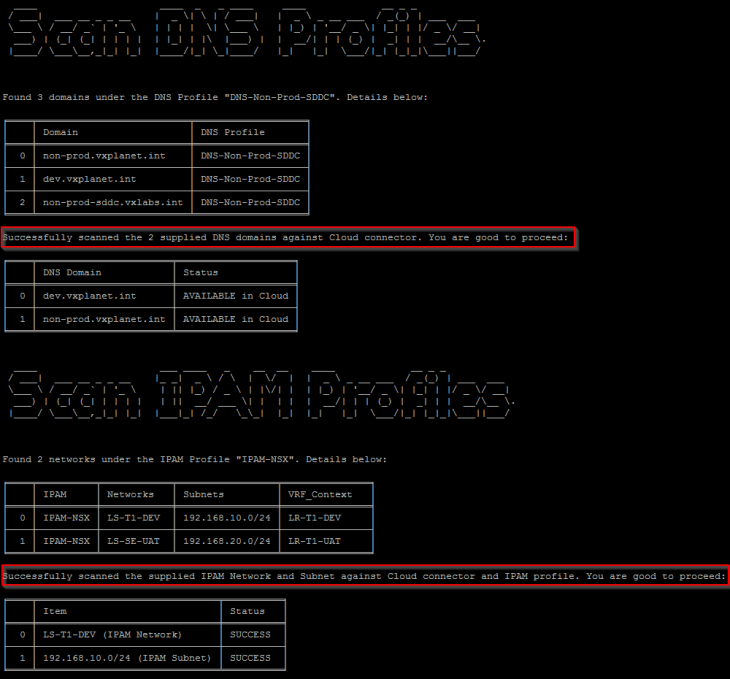
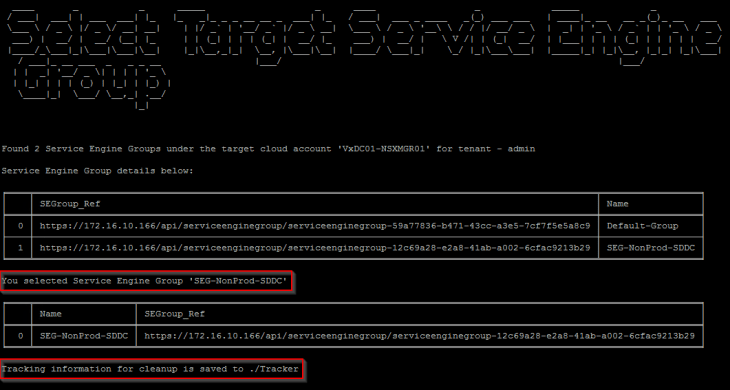
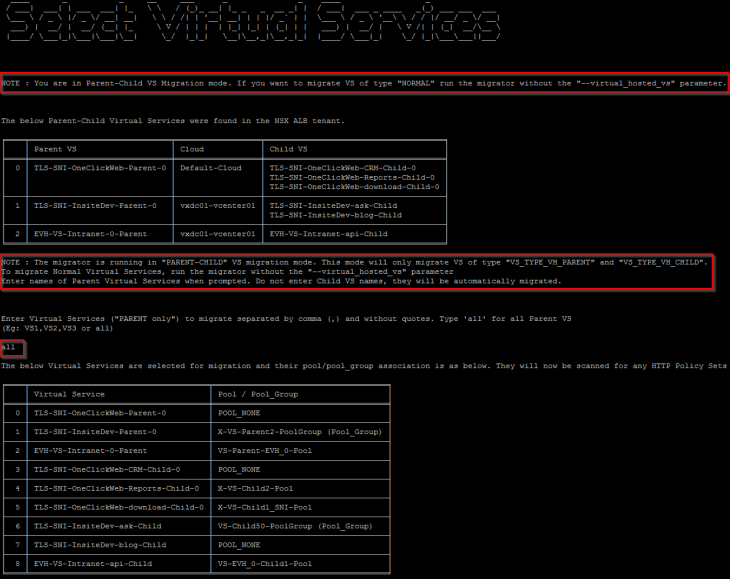
Because we specified the parameter “-q” or “–virtual_hosted_vs” in the migrator, this will only list all the SNI and EVH hosted virtual services to choose for migration. Let’s select the parent virtual services for migration. Only the Parent virtual services need to be specified, child virtual services will be automatically picked up by the workflow from the dependency chain.
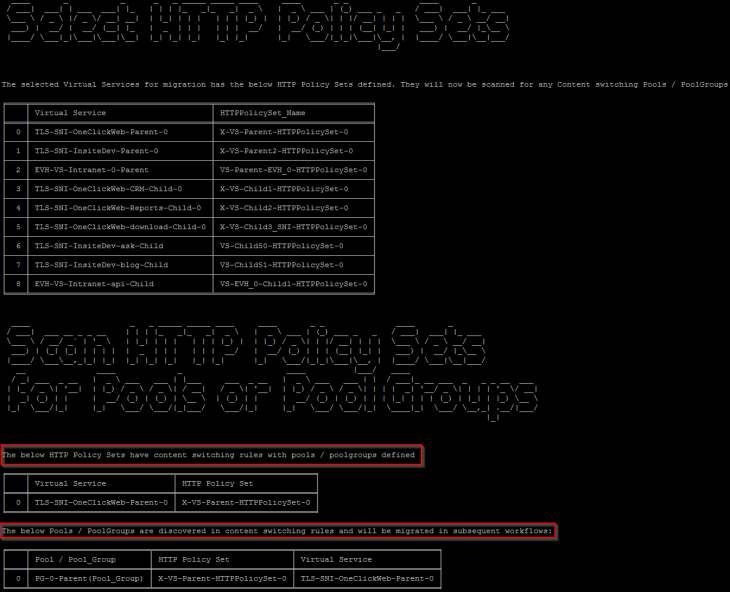
The tool will scan the selected virtual services for HTTP Policy Sets, then for pools / pool groups in HTTP Policy sets, and will migrate them to target NSX-T cloud.
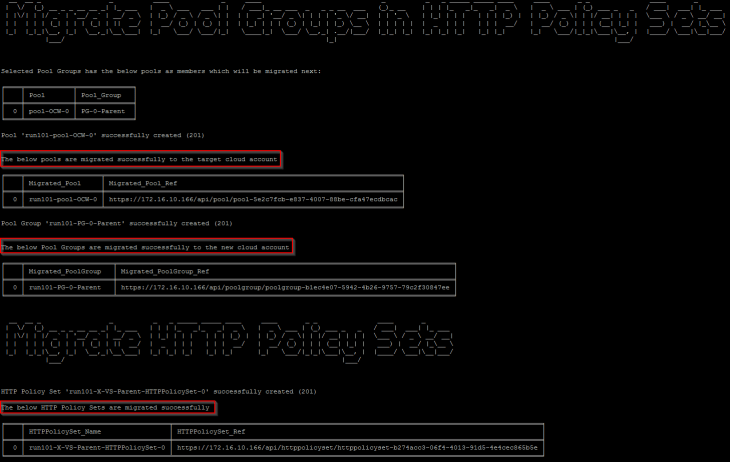
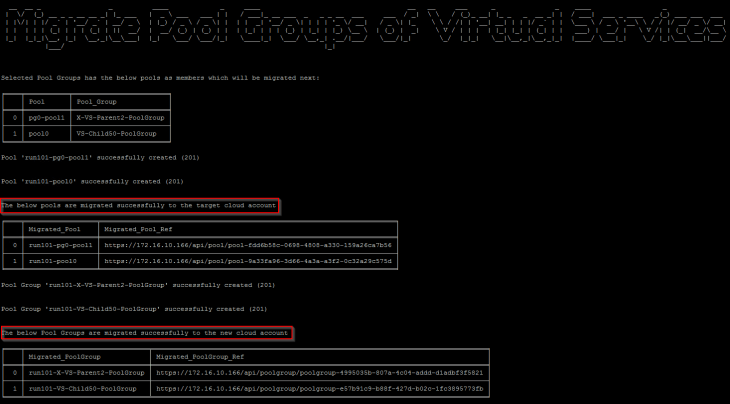
The tool will then scan selected virtual services for pools, pool groups and VSVIPs and will migrate them to target NSX-T cloud.
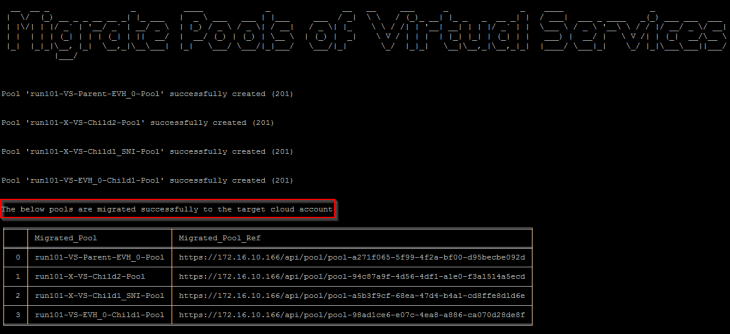
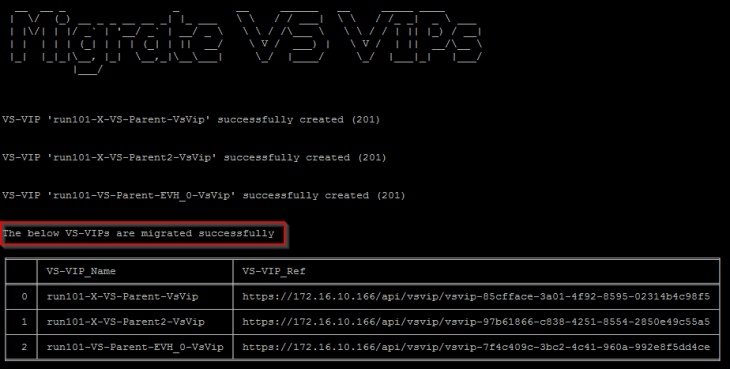
Finally, the virtual services are migrated, and the session is logged out.
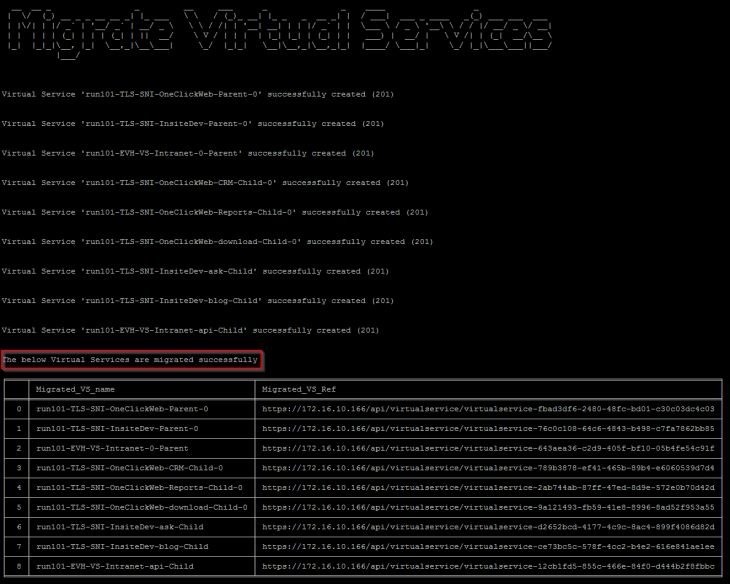
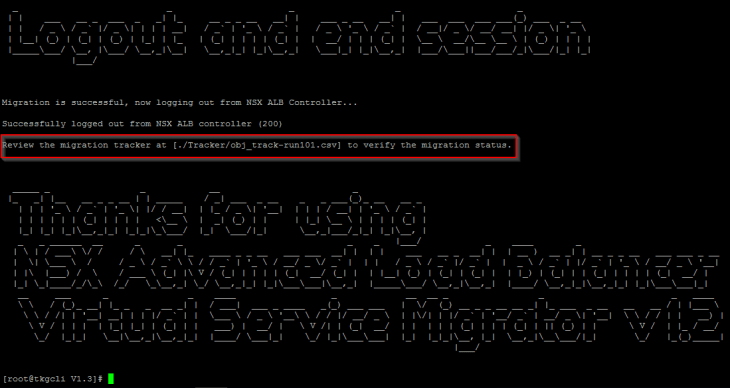
At this moment, the migration of SNI and EVH hosting to the target NSX-T cloud account is successful. Migrated objects are tracked in “NsxAlbVirtualServiceMigrator/V1.3/Tracker/obj_track-< RUN_ID>.csv”.
We will now login to the NSX ALB controller UI, verify and validate the migrated objects.
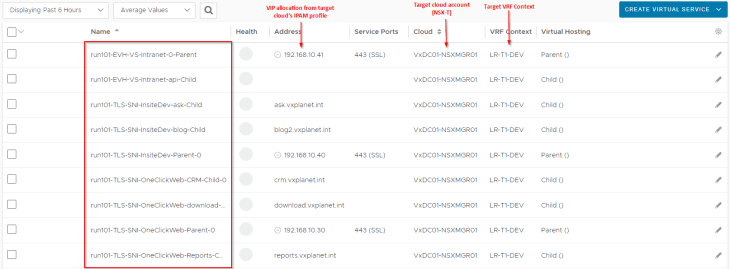
Performing application cutover
Once the migrated objects are validated, we should be good to perform the cutover. The existing virtual services are disabled, and the corresponding migrated virtual services are enabled. While performing disabling / enabling of virtual services, make sure to select both flags as shown below (as we also need to disable / enable ARP responses also)
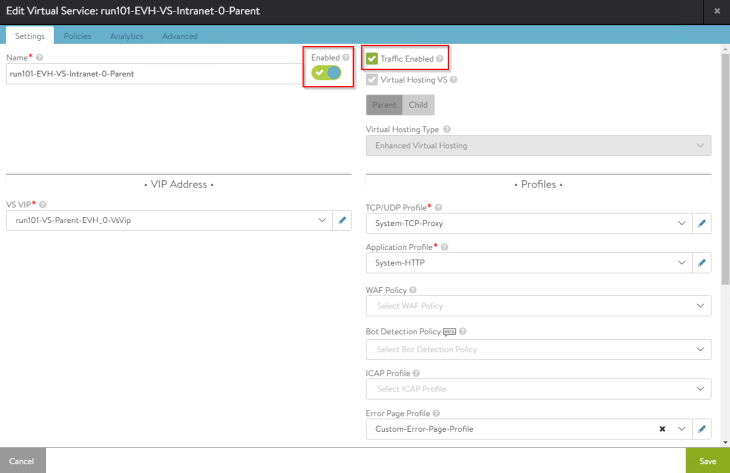
The below shows the application state after the virtual services are successfully cutover to NSX-T cloud.
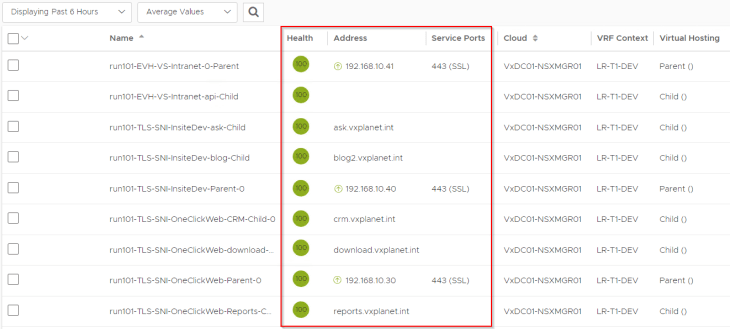
Performing Prefix removal
Now that the virtual service cutover is completed, we need to run the migrator tool again but in “remove_prefix” mode to remove the prefixes appended to objects during migration.
Let’s launch the help menu for remove_prefix mode.
We have a new parameter for the remove_prefix mode – “-q” or “- -virtual_hosted_vs” to support prefix removal for parent-child virtual services.
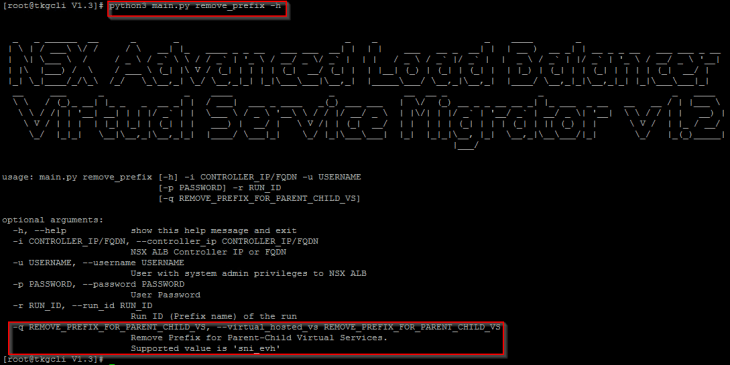
The prefix selected during migration (using the parameter -P ) needs to be unique for each migration job. This prefix will be taken as the runID to perform remove_prefix and cleanup tasks.

Let’s run the migrator and wait for the job to complete.
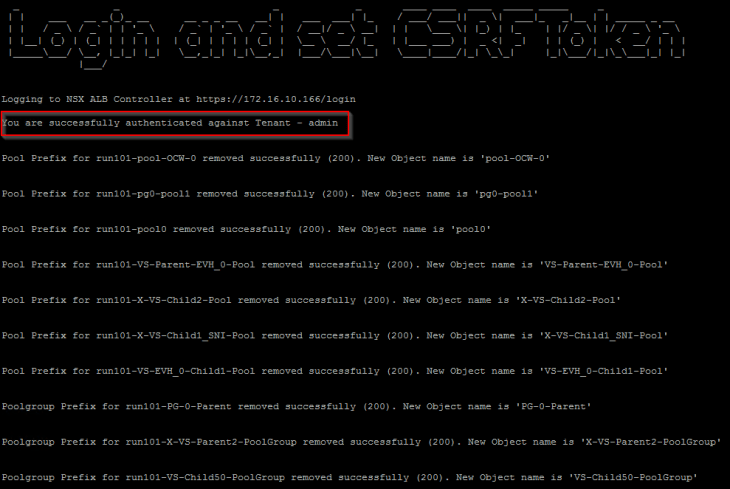

Job output is tracked in NsxAlbVirtualServiceMigrator/V1.3/Tracker/obj_prefix_removal_status_<RUN_ID>.csv”.
Let’s review the file and search for error, if any.
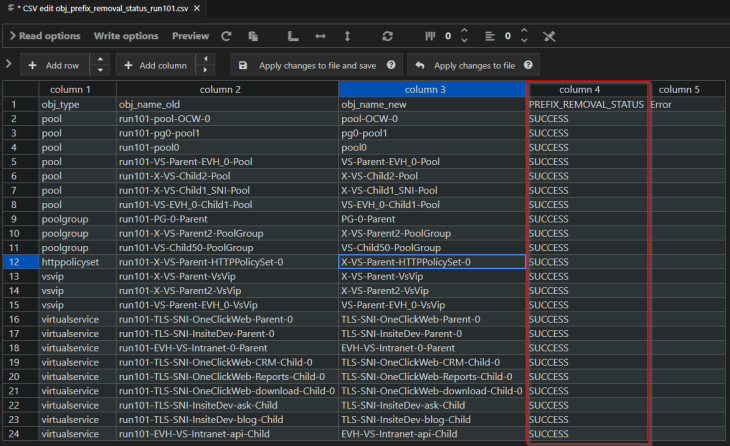
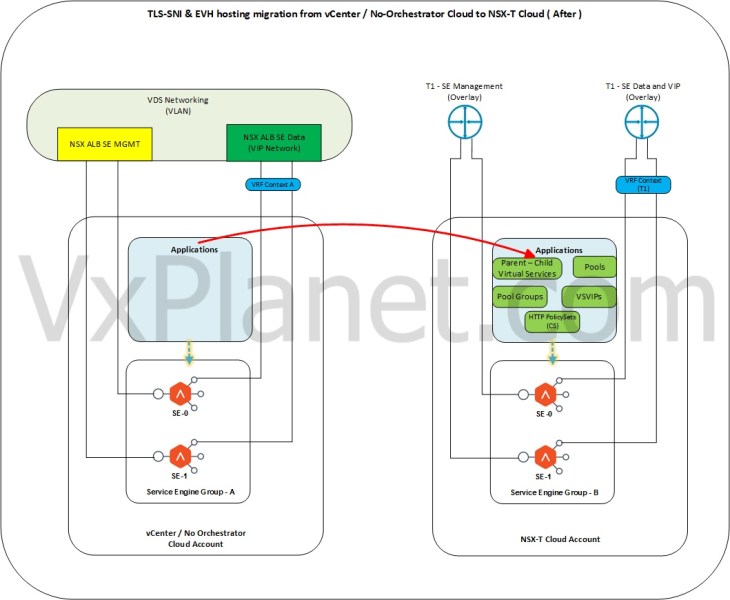
At this stage, the overall migration status is SUCCESSFUL. The below sketch shows the target application state.
Performing migration cleanup
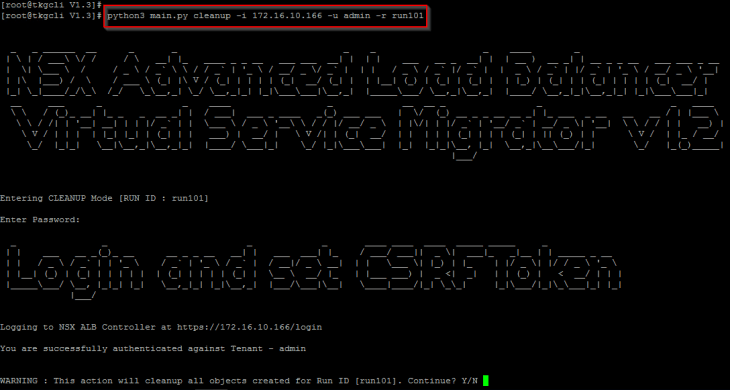
If at any stage of the migration process, we need to perform a cleanup of the migrated objects (either because the tool encountered an error, or because the post migration validation failed), we can run the tool in cleanup mode.
Note 1 : The “Tracker” directory under NsxAlbVirtualServiceMigrator/V1.3/ needs to be preserved to perform cleanup operation, as it maintains track of objects that are migrated.
Note 2 : As the cleanup task deletes all the migrated objects, this needs to be performed before performing the application cutover. There is no way to recover deleted objects.
Let’s run the cleanup job specifying the runID.
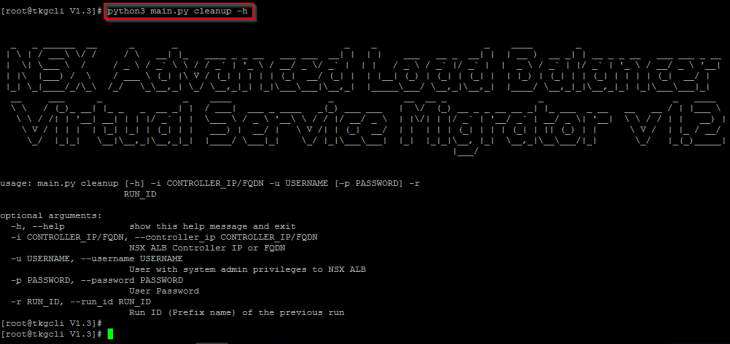
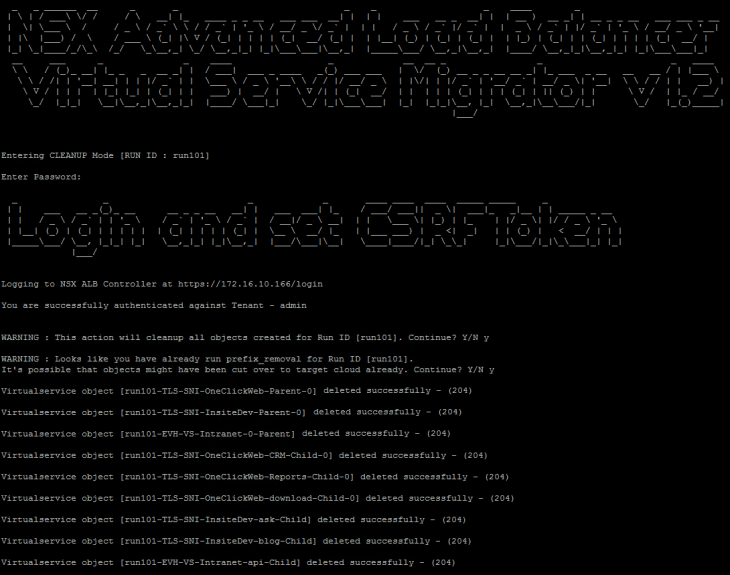
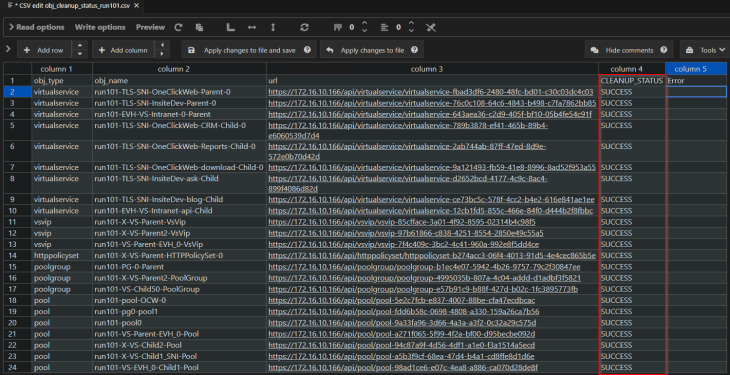
Cleanup status is tracked under “NsxAlbVirtualServiceMigrator/V1.3/Tracker/obj_cleanup_status_<RUN_ID>.csv”.
Let’s review the file and search for errors, if any.
Now that’s a wrap!!! Stay tuned for some major new enhancements to the tool in the next release (version 2.0).
If you wish to collaborate or leave a feedback, please reach out to me at hari@vxplanet.com
I hope this article was informative, and don’t forget to buy me a coffee if you found this worth reading.


